python调用opencv实现猫脸检测功能
Python 小猫检测,通过调用opencv自带的猫脸检测的分类器进行检测。
分类器有两个:haarcascade_frontalcatface.xml和
haarcascade_frontalcatface_extended.xml。可以在opencv的安装目录下找到
D:\Program Files\OPENCV320\opencv\sources\data\haarcascades
小猫检测代码为:
1. 直接读取图片调用
import cv2
image = cv2.imread("cat_04.png")
gray = cv2.cvtColor(image, cv2.COLOR_BGR2GRAY)
# load the cat detector Haar cascade, then detect cat faces
# in the input image
detector = cv2.CascadeClassifier("haarcascade_frontalcatface.xml")
#haarcascade_frontalcatface_extended.xml
rects = detector.detectMultiScale(gray, scaleFactor=1.1,
minNeighbors=10, minSize=(100, 100))
# loop over the cat faces and draw a rectangle surrounding each
print (enumerate(rects))
for (i, (x, y, w, h)) in enumerate(rects):
cv2.rectangle(image, (x, y), (x + w, y + h), (0, 0, 255), 2)
cv2.putText(image, "Cat #{}".format(i + 1), (x, y - 10),
cv2.FONT_HERSHEY_SIMPLEX, 0.55, (0, 0, 255), 2)
print (i, x,y,w,h)
# show the detected cat faces
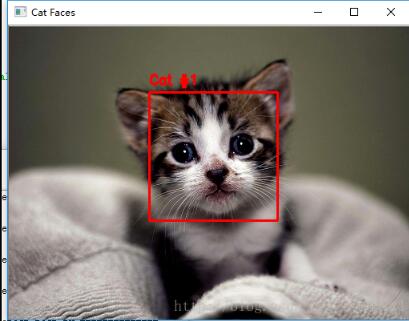
cv2.imshow("Cat Faces", image)
cv2.waitKey(1)
检测效果:

2. 通过命令控制符调用
也可以通过调用argparse库,进行整体调用
新建cat_detect.py文件
# import the necessary packages
import argparse
import cv2

# construct the argument parse and parse the arguments
ap = argparse.ArgumentParser()
ap.add_argument("-i", "--image", required=True,

 help="path to the input image")
ap.add_argument("-c", "--cascade", default="haarcascade_frontalcatface_extended.xml",
 help="path to cat detector haar cascade")

args = vars(ap.parse_args())
#"haarcascade_frontalcatface_extended.xml",

# load the input image and convert it to grayscale
#image = cv2.imread(args["image"])
image = cv2.imread(args["image"])
gray = cv2.cvtColor(image, cv2.COLOR_BGR2GRAY)
# load the cat detector Haar cascade, then detect cat faces

# in the input image
detector = cv2.CascadeClassifier(args["cascade"])
rects = detector.detectMultiScale(gray, scaleFactor=1.1,

 minNeighbors=10, minSize=(120, 120)) # cat good

# loop over the cat faces and draw a rectangle surrounding each
print (enumerate(rects))
for (i, (x, y, w, h)) in enumerate(rects):

 cv2.rectangle(image, (x, y), (x + w, y + h), (0, 0, 255), 2)
 cv2.putText(image, "cat #{}".format(i + 1), (x, y - 10),
 cv2.FONT_HERSHEY_SIMPLEX, 0.55, (0, 0, 255), 2)
# show the detected cat faces
cv2.imshow("Cat Faces", image)
cv2.waitKey(0)
通过“命令控制符”调用
cmd
cd E:\WORK\py\detectCat
E:\WORK\py\detectCat>python cat_detector.py --image cat_07.png
以上就是本文的全部内容,希望对大家的学习有所帮助,也希望大家多多支持【听图阁-专注于Python设计】。