python之wxPython菜单使用详解
本文实例讲述了python中wxPython菜单的使用方法,分享给大家供大家参考。具体如下:
先来看看下面这段代码:
import wx
APP_EXIT=1  #定义一个控件ID

class Example(wx.Frame):
  def __init__(self, parent, id, title):
    super(Example,self).__init__(parent, id, title)    #调用你类的初始化

    self.InitUI()      #调用自身的函数

  def InitUI(self):  #自定义的函数,完成菜单的设置

    menubar = wx.MenuBar()    #生成菜单栏
    filemenu = wx.Menu()    #生成一个菜单


    qmi = wx.MenuItem(filemenu, APP_EXIT, "Quit")   #生成一个菜单项
    qmi.SetBitmap(wx.Bitmap("2.bmp"))    #给菜单项前面加个小图标
    filemenu.AppendItem(qmi)      #把菜单项加入到菜单中

    menubar.Append(filemenu, "&File")    #把菜单加入到菜单栏中
    self.SetMenuBar(menubar)      #把菜单栏加入到Frame框架中

    self.Bind(wx.EVT_MENU, self.OnQuit, id=APP_EXIT)  #给菜单项加入事件处理

    self.SetSize((300, 200))      #设置下Frame的大小,标题,和居中对齐
    self.SetTitle("simple menu")
    self.Centre()

    self.Show(True)    #显示框架

  def OnQuit(self, e):  #自定义函数 响应菜单项
    self.Close()

def main():

  ex = wx.App()      #生成一个应用程序
  Example(None, id=-1, title="main")  #调用我们的类
  ex.MainLoop()#消息循环

if __name__ == "__main__":
  main()
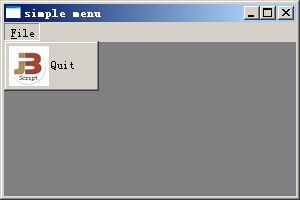
运行效果如下图所示:
这里再来解释下几个API,官方文档如下:
wxMenuItem* wxMenu::AppendSeparator()
Adds a separator to the end of the menu.
See also:
Append(), InsertSeparator()
wxMenuItem::wxMenuItem ( wxMenu * parentMenu = NULL,
int id = wxID_SEPARATOR,
const wxString & text = wxEmptyString,
const wxString & helpString = wxEmptyString,
wxItemKind kind = wxITEM_NORMAL,
wxMenu * subMenu = NULL
)
Constructs a wxMenuItem object.
Menu items can be standard, or "stock menu items", or custom. For the standard menu items (such as commands to open a file, exit the program and so on, see Stock items for the full list) it is enough to specify just the stock ID and leave text and helpString empty. Some platforms (currently wxGTK only, and see the remark in SetBitmap() documentation) will also show standard bitmaps for stock menu items.
Leaving at least text empty for the stock menu items is actually strongly recommended as they will have appearance and keyboard interface (including standard accelerators) familiar to the user.
For the custom (non-stock) menu items, text must be specified and while helpString may be left empty, it's recommended to pass the item description (which is automatically shown by the library in the status bar when the menu item is selected) in this parameter.
Finally note that you can e.g. use a stock menu label without using its stock help string:
// use all stock properties:
helpMenu->Append(wxID_ABOUT);
// use the stock label and the stock accelerator but not the stock help string:
helpMenu->Append(wxID_ABOUT, "", "My custom help string");
// use all stock properties except for the bitmap:
wxMenuItem *mymenu = new wxMenuItem(helpMenu, wxID_ABOUT);
mymenu->SetBitmap(wxArtProvider::GetBitmap(wxART_WARNING));
helpMenu->Append(mymenu);
that is, stock properties are set independently one from the other.
Parameters:
parentMenu Menu that the menu item belongs to. Can be NULL if the item is going to be added to the menu later.
id Identifier for this menu item. May be wxID_SEPARATOR, in which case the given kind is ignored and taken to be wxITEM_SEPARATOR instead.
text Text for the menu item, as shown on the menu. See SetItemLabel() for more info.
helpString Optional help string that will be shown on the status bar.
kind May be wxITEM_SEPARATOR, wxITEM_NORMAL, wxITEM_CHECK or wxITEM_RADIO.
subMenu If non-NULL, indicates that the menu item is a submenu.
wxMenuItem* wxMenu::Append ( int id,
const wxString & item = wxEmptyString,
const wxString & helpString = wxEmptyString,
wxItemKind kind = wxITEM_NORMAL
)
Adds a menu item.
Parameters:
id The menu command identifier.
item The string to appear on the menu item. See wxMenuItem::SetItemLabel() for more details.
helpString An optional help string associated with the item. By default, the handler for the wxEVT_MENU_HIGHLIGHT event displays this string in the status line.
kind May be wxITEM_SEPARATOR, wxITEM_NORMAL, wxITEM_CHECK or wxITEM_RADIO.
Example:
m_pFileMenu->Append(ID_NEW_FILE, "&New file\tCTRL+N", "Creates a new XYZ document");
or even better for stock menu items (see wxMenuItem::wxMenuItem):
m_pFileMenu->Append(wxID_NEW, "", "Creates a new XYZ document");
Remarks:
This command can be used after the menu has been shown, as well as on initial creation of a menu or menubar.
希望本文所述对大家的Python程序设计有所帮助。
