关于初始种子自动选取的区域生长实例(python+opencv)
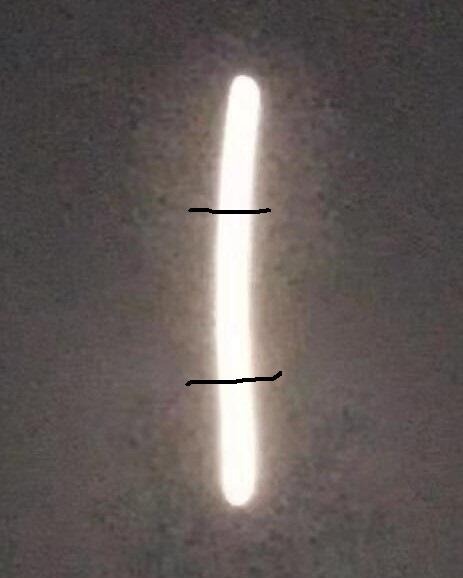
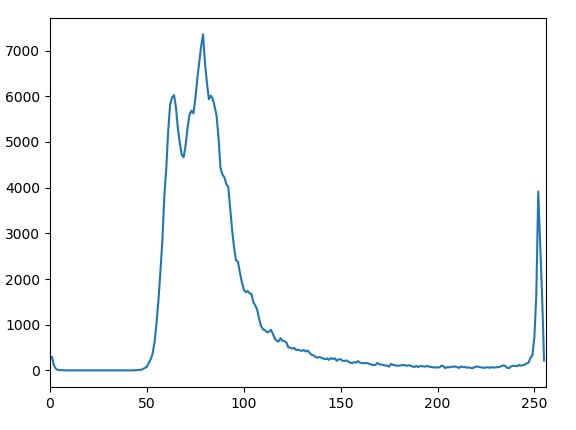
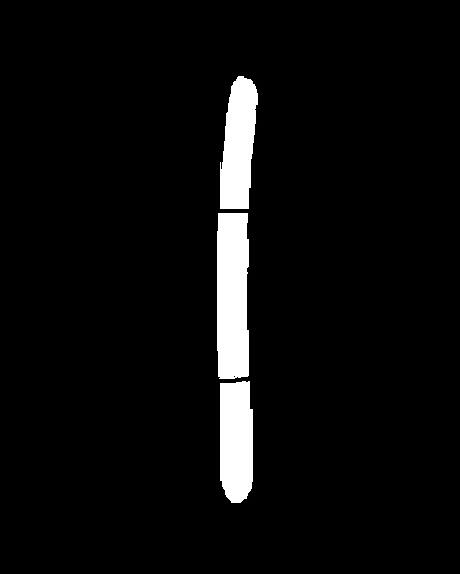
算法中,初始种子可自动选择(通过不同的划分可以得到不同的种子,可按照自己需要改进算法),图分别为原图(自己画了两笔为了分割成不同区域)、灰度图直方图、初始种子图、区域生长结果图。
另外,不管时初始种子选择还是区域生长,阈值选择很重要。
import cv2
import numpy as np
import matplotlib.pyplot as plt

#初始种子选择
def originalSeed(gray, th):
 ret, thresh = cv2.cv2.threshold(gray, th, 255, cv2.THRESH_BINARY)#二值图,种子区域(不同划分可获得不同种子)
 kernel = cv2.getStructuringElement(cv2.MORPH_ELLIPSE, (3,3))#3×3结构元

 thresh_copy = thresh.copy() #复制thresh_A到thresh_copy
 thresh_B = np.zeros(gray.shape, np.uint8) #thresh_B大小与A相同,像素值为0

 seeds = [ ] #为了记录种子坐标

 #循环,直到thresh_copy中的像素值全部为0
 while thresh_copy.any():

  Xa_copy, Ya_copy = np.where(thresh_copy > 0) #thresh_A_copy中值为255的像素的坐标
  thresh_B[Xa_copy[0], Ya_copy[0]] = 255 #选取第一个点,并将thresh_B中对应像素值改为255

  #连通分量算法,先对thresh_B进行膨胀,再和thresh执行and操作(取交集)
  for i in range(200):
   dilation_B = cv2.dilate(thresh_B, kernel, iterations=1)
   thresh_B = cv2.bitwise_and(thresh, dilation_B)

  #取thresh_B值为255的像素坐标,并将thresh_copy中对应坐标像素值变为0
  Xb, Yb = np.where(thresh_B > 0)
  thresh_copy[Xb, Yb] = 0

  #循环,在thresh_B中只有一个像素点时停止
  while str(thresh_B.tolist()).count("255") > 1:
   thresh_B = cv2.erode(thresh_B, kernel, iterations=1) #腐蚀操作

  X_seed, Y_seed = np.where(thresh_B > 0) #取处种子坐标
  if X_seed.size > 0 and Y_seed.size > 0:
   seeds.append((X_seed[0], Y_seed[0]))#将种子坐标写入seeds
  thresh_B[Xb, Yb] = 0 #将thresh_B像素值置零
 return seeds

#区域生长
def regionGrow(gray, seeds, thresh, p):
 seedMark = np.zeros(gray.shape)
 #八邻域
 if p == 8:
  connection = [(-1, -1), (-1, 0), (-1, 1), (0, 1), (1, 1), (1, 0), (1, -1), (0, -1)]
 elif p == 4:
  connection = [(-1, 0), (0, 1), (1, 0), (0, -1)]

 #seeds内无元素时候生长停止
 while len(seeds) != 0:
  #栈顶元素出栈
  pt = seeds.pop(0)
  for i in range(p):
   tmpX = pt[0] + connection[i][0]
   tmpY = pt[1] + connection[i][1]

   #检测边界点
   if tmpX < 0 or tmpY < 0 or tmpX >= gray.shape[0] or tmpY >= gray.shape[1]:
    continue

   if abs(int(gray[tmpX, tmpY]) - int(gray[pt])) < thresh and seedMark[tmpX, tmpY] == 0:
    seedMark[tmpX, tmpY] = 255
    seeds.append((tmpX, tmpY))
 return seedMark


path = "_rg.jpg"
img = cv2.imread(path)
gray = cv2.cvtColor(img, cv2.COLOR_BGR2GRAY)
#hist = cv2.calcHist([gray], [0], None, [256], [0,256])#直方图

seeds = originalSeed(gray, th=253)
seedMark = regionGrow(gray, seeds, thresh=3, p=8)

#plt.plot(hist)
#plt.xlim([0, 256])
#plt.show()
cv2.imshow("seedMark", seedMark)
cv2.waitKey(0)

以上这篇关于初始种子自动选取的区域生长实例(python+opencv)就是小编分享给大家的全部内容了,希望能给大家一个参考,也希望大家多多支持【听图阁-专注于Python设计】。