python3个性签名设计实现代码
本文实例为大家分享了python个性签名设计的具体代码,供大家参考,具体内容如下
参考博客:Python GUI Tkinter简单实现个性签名设计
参考博客:python3爬虫之设计签名小程序
Code
from tkinter import *
from tkinter import messagebox
import requests
import re
from PIL import Image,ImageTk

#模拟浏览器发送请求
def download():
  startUrl = 'http://www.uustv.com/'
  name = enter.get()

  #name = name.strip()
  if not name:
    messagebox.showinfo('提示:','请输入用户名')
  else:
    data= {
      'word':name,
      'sizes':60,
      'fonts':'jfcs.ttf',
      'fontcolor':'#000000'
    }
    result = requests.post(startUrl,data = data)
    result.encoding = 'utf-8'
    html = result.text
    reg ='<div class="tu">.*?<img src="(.*?)"/></div>'
    imagePath = re.findall(reg,html)
    #图片完整路径
    imgUrl = startUrl + imagePath[0]
    #获取图片内容
    response = requests.get(imgUrl).content
    f = open('{}.gif'.format(name),'wb')
    f.write(response)
    #写入
    #怎么把图片放到窗口上,显示图片
    bm = ImageTk.PhotoImage(file ='{}.gif'.format(name))
    label2 = Label(root,image = bm)
    #image属性
    label2.bm = bm
    #绘图
    label2.grid(row = 2,columnspan = 2)
#创建窗口
root = Tk()
#标题
root.title('签名设计')
#窗口大小,中间的是小写的x,而不 是乘号
root.geometry('600x300')
#窗口的初始位置
root.geometry('+400+300')
#标签的控件
label = Label(root,text = '签名',font = ('华文行楷',20),fg = 'red')
#grid pack place
label.grid()
#输入框
enter = Entry(root,font = ('微软雅黑',20))
#设置输入框的位置
enter.grid(row = 0,column = 1)
#点击按钮
button = Button(root,text = '设计签名',font =('微软雅黑',20),command = download) #调用函数
#设置点击按钮的位置
button.grid(row = 1,column = 0)
#消息循环,可以理解为显示窗口
root.mainloop()
Results
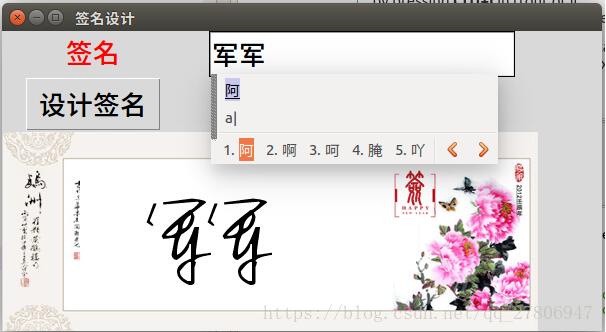
以上就是本文的全部内容,希望对大家的学习有所帮助,也希望大家多多支持【听图阁-专注于Python设计】。