python opencv实现图片旋转矩形分割
有时候需要对有角度的矩形框内图像从原图片中分割出来。这里的程序思想是,先将图片进行矩形角度的旋转,使有角度的矩形处于水平状态后,根据原来坐标分割图片。
参考:python opencv实现旋转矩形框裁减功能
修改原来的程序:
1.旋转函数的输入仅为矩形的四点坐标
2.角度由公式计算出来
3.矩形四点pt1,pt2,pt3,pt4由txt文件读入
4.在旋转程序中还处理了顺时针和逆时针及出现矩形框翻转的问题。
代码:
# -*- coding:utf-8 -*-
import cv2
from math import *
import numpy as np
import time,math
import os
import re

'''旋转图像并剪裁'''
def rotate(
    img, # 图片
    pt1, pt2, pt3, pt4
):
  print pt1,pt2,pt3,pt4
  withRect = math.sqrt((pt4[0] - pt1[0]) ** 2 + (pt4[1] - pt1[1]) ** 2) # 矩形框的宽度
  heightRect = math.sqrt((pt1[0] - pt2[0]) ** 2 + (pt1[1] - pt2[1]) **2)
  print withRect,heightRect
  angle = acos((pt4[0] - pt1[0]) / withRect) * (180 / math.pi) # 矩形框旋转角度
  print angle

  if pt4[1]>pt1[1]:
    print "顺时针旋转"
  else:
    print "逆时针旋转"
    angle=-angle

  height = img.shape[0] # 原始图像高度
  width = img.shape[1]  # 原始图像宽度
  rotateMat = cv2.getRotationMatrix2D((width / 2, height / 2), angle, 1) # 按angle角度旋转图像
  heightNew = int(width * fabs(sin(radians(angle))) + height * fabs(cos(radians(angle))))
  widthNew = int(height * fabs(sin(radians(angle))) + width * fabs(cos(radians(angle))))

  rotateMat[0, 2] += (widthNew - width) / 2
  rotateMat[1, 2] += (heightNew - height) / 2
  imgRotation = cv2.warpAffine(img, rotateMat, (widthNew, heightNew), borderValue=(255, 255, 255))
  cv2.imshow('rotateImg2', imgRotation)
  cv2.waitKey(0)

  # 旋转后图像的四点坐标
  [[pt1[0]], [pt1[1]]] = np.dot(rotateMat, np.array([[pt1[0]], [pt1[1]], [1]]))
  [[pt3[0]], [pt3[1]]] = np.dot(rotateMat, np.array([[pt3[0]], [pt3[1]], [1]]))
  [[pt2[0]], [pt2[1]]] = np.dot(rotateMat, np.array([[pt2[0]], [pt2[1]], [1]]))
  [[pt4[0]], [pt4[1]]] = np.dot(rotateMat, np.array([[pt4[0]], [pt4[1]], [1]]))

  # 处理反转的情况
  if pt2[1]>pt4[1]:
    pt2[1],pt4[1]=pt4[1],pt2[1]
  if pt1[0]>pt3[0]:
    pt1[0],pt3[0]=pt3[0],pt1[0]

  imgOut = imgRotation[int(pt2[1]):int(pt4[1]), int(pt1[0]):int(pt3[0])]
  cv2.imshow("imgOut", imgOut) # 裁减得到的旋转矩形框
  cv2.waitKey(0)
  return imgRotation # rotated image


# 根据四点画原矩形
def drawRect(img,pt1,pt2,pt3,pt4,color,lineWidth):
  cv2.line(img, pt1, pt2, color, lineWidth)
  cv2.line(img, pt2, pt3, color, lineWidth)
  cv2.line(img, pt3, pt4, color, lineWidth)
  cv2.line(img, pt1, pt4, color, lineWidth)

# 读出文件中的坐标值
def ReadTxt(directory,imageName,last):
  fileTxt=directory+"//rawLabel//"+imageName[:7]+last # txt文件名
  getTxt=open(fileTxt, 'r') # 打开txt文件
  lines = getTxt.readlines()
  length=len(lines)
  for i in range(0,length,4):
    pt2=list(map(float,lines[i].split(' ')[:2]))
    pt1=list(map(float,lines[i+1].split(' ')[:2]))
    pt4=list(map(float,lines[i+2].split(' ')[:2]))
    pt3=list(map(float,re.split('\n| ',lines[i+3])[:2]))
    # float转int

    pt2=list(map(int,pt2))
    pt1=list(map(int,pt1))
    pt4=list(map(int,pt4))
    pt3=list(map(int,pt3))

    imgSrc = cv2.imread(imageName)
    drawRect(imgSrc, tuple(pt1),tuple(pt2),tuple(pt3),tuple(pt4), (0, 0, 255), 2)
    cv2.imshow("img", imgSrc)
    cv2.waitKey(0)
    rotate(imgSrc,pt1,pt2,pt3,pt4)


if __name__=="__main__":
  directory = "G://grasp//grapCode//trainImage//jpg//4"
  last = 'cneg.txt'
  imageName="pcd0247r.png"
  ReadTxt(directory,imageName,last)
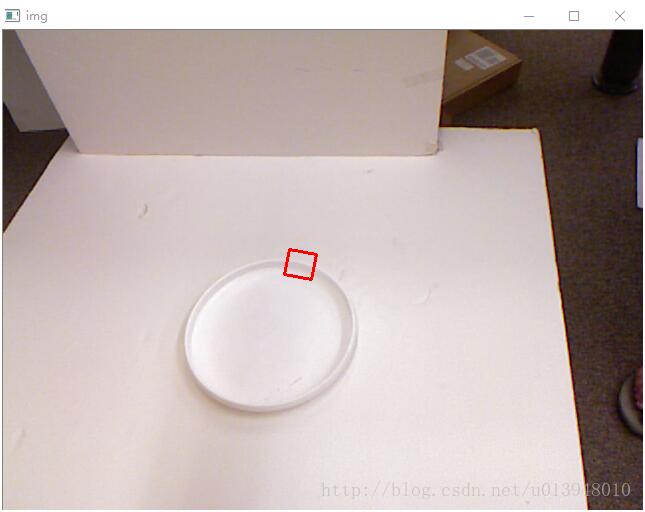
原带角度的矩形框:
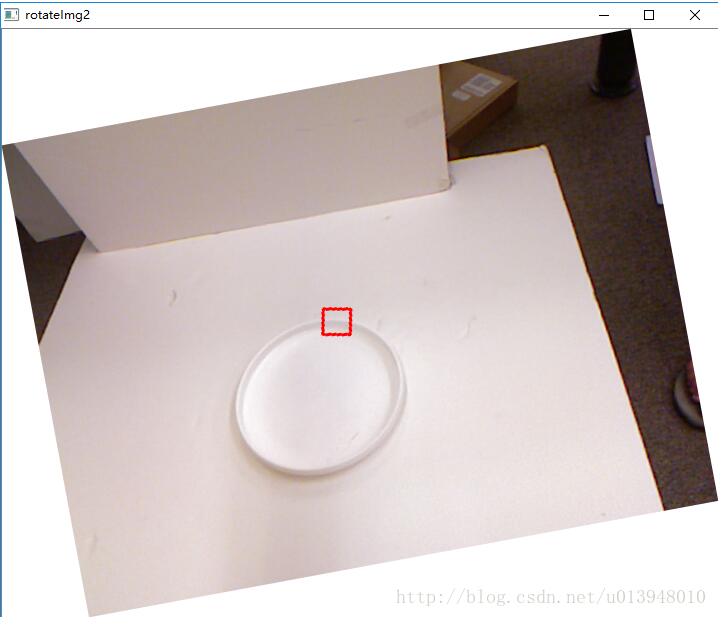
旋转矩形框:
分割:

以上就是本文的全部内容,希望对大家的学习有所帮助,也希望大家多多支持【听图阁-专注于Python设计】。