使用python采集脚本之家电子书资源并自动下载到本地的实例脚本
jb51上面的资源还比较全,就准备用python来实现自动采集信息,与下载啦。
Python具有丰富和强大的库,使用urllib,re等就可以轻松开发出一个网络信息采集器!
下面,是我写的一个实例脚本,用来采集某技术网站的特定栏目的所有电子书资源,并下载到本地保存!
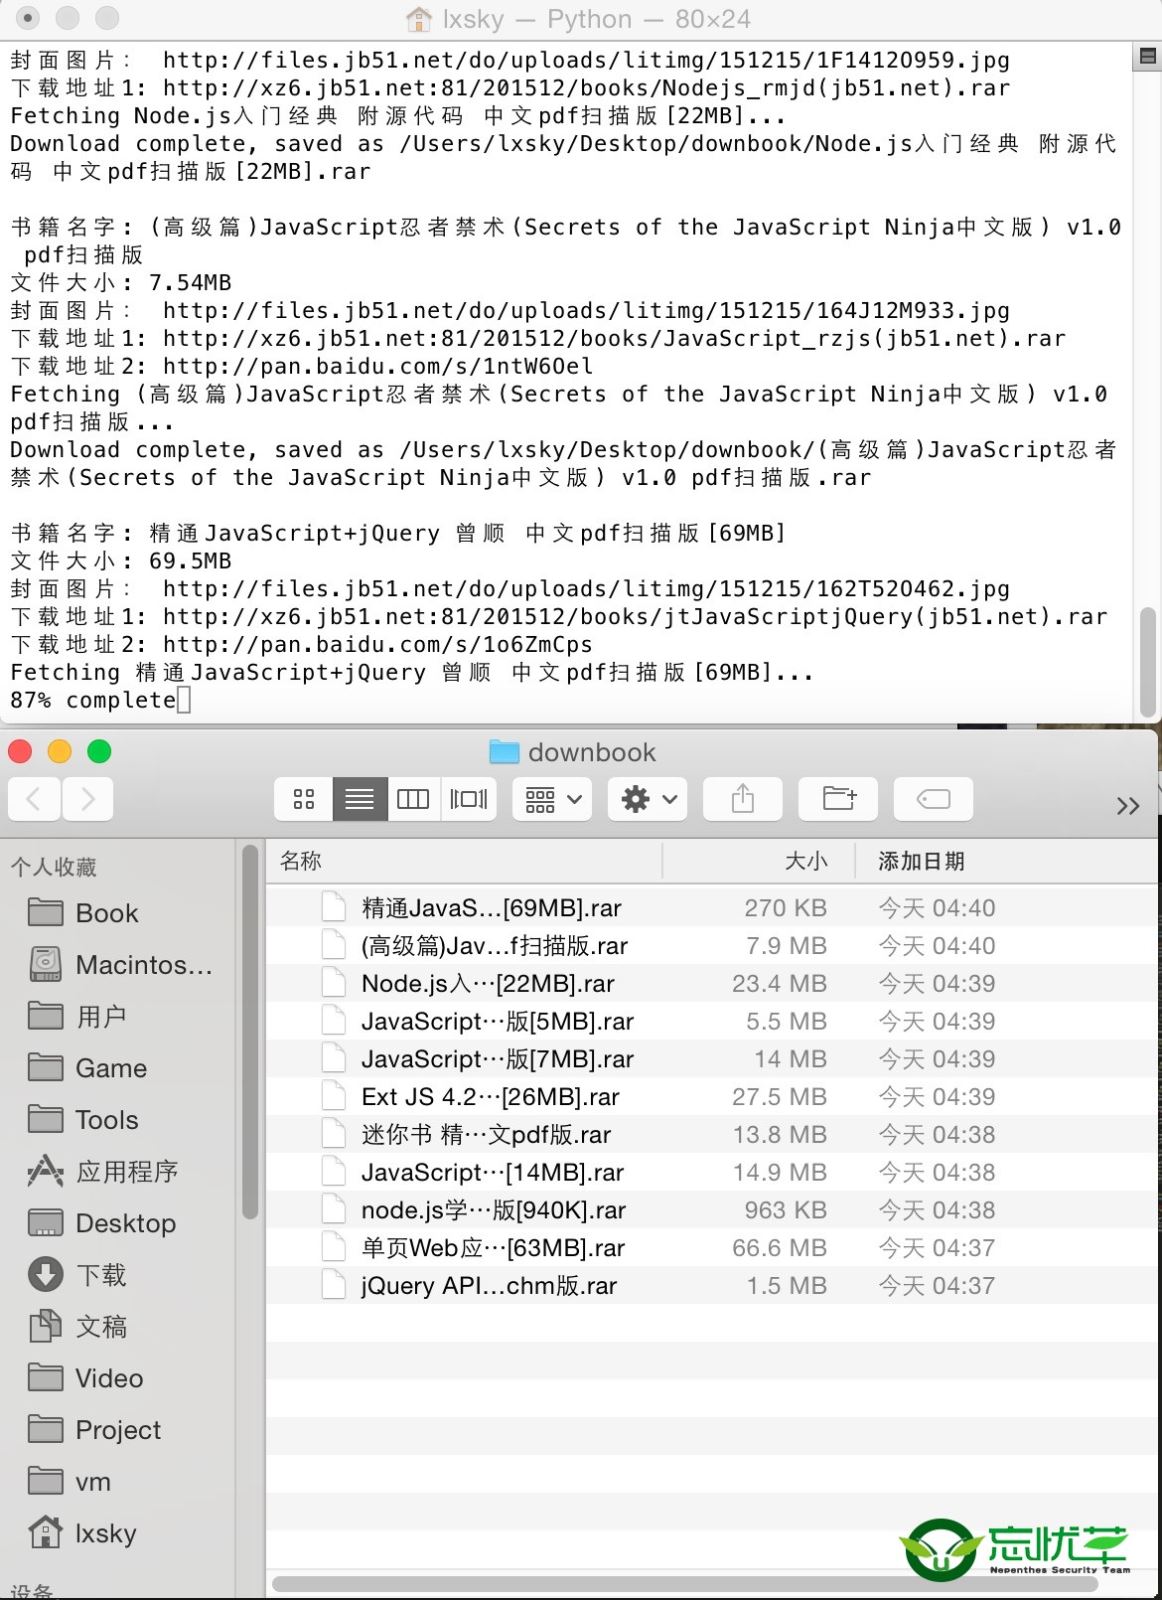
软件运行截图如下:

在脚本运行时期,不但会打印出信息到shell窗口,还会保存日志到txt文件,记录采集到的页面地址,书籍的名称,大小,服务器本地下载地址以及百度网盘的下载地址!
实例采集并下载【听图阁-专注于Python设计】的python栏目电子书资源:
# -*- coding:utf-8 -*-
import re
import urllib2
import urllib
import sys
import os
reload(sys)
sys.setdefaultencoding('utf-8')
def getHtml(url):
 request = urllib2.Request(url)
 page = urllib2.urlopen(request)
 htmlcontent = page.read()
 #解决中文乱码问题
 htmlcontent = htmlcontent.decode('gbk', 'ignore').encode("utf8",'ignore')
 return htmlcontent
def report(count, blockSize, totalSize):
 percent = int(count*blockSize*100/totalSize)
 sys.stdout.write("r%d%%" % percent + ' complete')
 sys.stdout.flush()
def getBookInfo(url):
 htmlcontent = getHtml(url);
 #print "htmlcontent=",htmlcontent; # you should see the ouput html
 #<h1 class="h1user">crifan</h1>
 regex_title = '<h1s+?itemprop="name">(?P<title>.+?)</h1>';
 title = re.search(regex_title, htmlcontent);
 if(title):
 title = title.group("title");
 print "书籍名字:",title;
 file_object.write('书籍名字:'+title+'r');
 #<li>书籍大小:<span itemprop="fileSize">27.2MB</span></li>
 filesize = re.search('<spans+?itemprop="fileSize">(?P<filesize>.+?)</span>', htmlcontent);
 if(filesize):
 filesize = filesize.group("filesize");
 print "文件大小:",filesize;
 file_object.write('文件大小:'+filesize+'r');
 #<div class="picthumb"><a href="//files.jb51.net/do/uploads/litimg/151210/1A9262GO2.jpg" target="_blank"
 bookimg = re.search('<divs+?class="picthumb"><a href="(?P<bookimg>.+?)" rel="external nofollow" target="_blank"', htmlcontent);
 if(bookimg):
 bookimg = bookimg.group("bookimg");
 print "封面图片:",bookimg;
 file_object.write('封面图片:'+bookimg+'r');
 #<li><a href="http://xz6.jb51.net:81/201512/books/JavaWeb100(jb51.net).rar" target="_blank">酷云中国电信下载</a></li>
 downurl1 = re.search('<li><a href="(?P<downurl1>.+?)" rel="external nofollow" target="_blank">酷云中国电信下载</a></li>', htmlcontent);
 if(downurl1):
 downurl1 = downurl1.group("downurl1");
 print "下载地址1:",downurl1;
 file_object.write('下载地址1:'+downurl1+'r');
 sys.stdout.write('rFetching ' + title + '...n')
 title = title.replace(' ', '');
 title = title.replace('/', '');
 saveFile = '/Users/superl/Desktop/pythonbook/'+title+'.rar';
 if os.path.exists(saveFile):
 print "该文件已经下载了!";
 else:
 urllib.urlretrieve(downurl1, saveFile, reporthook=report);
 sys.stdout.write("rDownload complete, saved as %s" % (saveFile) + 'nn')
 sys.stdout.flush()
 file_object.write('文件下载成功!r');
 else:
 print "下载地址1不存在";
 file_error.write(url+'r');
 file_error.write(title+"下载地址1不存在!文件没有自动下载!r");
 file_error.write('r');
 #<li><a href="http://pan.baidu.com/s/1pKfVNwJ" rel="external nofollow" target="_blank">百度网盘下载2</a></li>
 downurl2 = re.search('</a></li><li><a href="(?P<downurl2>.+?)" rel="external nofollow" target="_blank">百度网盘下载2</a></li>', htmlcontent);
 if(downurl2):
 downurl2 = downurl2.group("downurl2");
 print "下载地址2:",downurl2;
 file_object.write('下载地址2:'+downurl2+'r');
 else:
 #file_error.write(url+'r');
 print "下载地址2不存在";
 file_error.write(title+"下载地址2不存在r");
 file_error.write('r');
 file_object.write('r');
 print "n";
def getBooksUrl(url):
 htmlcontent = getHtml(url);
 #<ul class="cur-cat-list"><a href="/books/438381.html" rel="external nofollow" class="tit"</ul></div><!--end #content -->
 urls = re.findall('<a href="(?P<urls>.+?)" rel="external nofollow" class="tit"', htmlcontent);
 for url in urls:
 url = "//www.jb51.net"+url;
 print url+"n";
 file_object.write(url+'r');
 getBookInfo(url)
 #print "url->", url
if __name__=="__main__":
 file_object = open('/Users/superl/Desktop/python.txt','w+');
 file_error = open('/Users/superl/Desktop/pythonerror.txt','w+');
 pagenum = 3;
 for pagevalue in range(1,pagenum+1):
 listurl = "//www.jb51.net/ books/list476_%d.html"%pagevalue;
 print listurl;
 file_object.write(listurl+'r');
 getBooksUrl(listurl);
 file_object.close();
 file_error.close();
注意,上面代码部分地方的url被我换了。
总结
以上所述是小编给大家介绍的python采集jb51电子书资源并自动下载到本地实例脚本,希望对大家有所帮助,如果大家有任何疑问请给我留言,小编会及时回复大家的。在此也非常感谢大家对【听图阁-专注于Python设计】网站的支持!

