python elasticsearch从创建索引到写入数据的全过程
python elasticsearch从创建索引到写入数据
创建索引
from elasticsearch import Elasticsearch
es = Elasticsearch('192.168.1.1:9200')
mappings = {
      "mappings": {
        "type_doc_test": {              #type_doc_test为doc_type
          "properties": {
            "id": {
              "type": "long",
              "index": "false"
            },
            "serial": {
              "type": "keyword", # keyword不会进行分词,text会分词
              "index": "false" # 不建索引
            },
            #tags可以存json格式,访问tags.content
            "tags": {
              "type": "object",
              "properties": {
                "content": {"type": "keyword", "index": True},
                "dominant_color_name": {"type": "keyword", "index": True},
                "skill": {"type": "keyword", "index": True},
              }
            },
            "hasTag": {
              "type": "long",
              "index": True
            },
            "status": {
              "type": "long",
              "index": True
            },
            "createTime": {
              "type": "date",
              "format": "yyyy-MM-dd HH:mm:ss||yyyy-MM-dd||epoch_millis"
            },
            "updateTime": {
              "type": "date",
              "format": "yyyy-MM-dd HH:mm:ss||yyyy-MM-dd||epoch_millis"
            }
          }
        }
      }
    }
res = es.indices.create(index = 'index_test',body =mappings)
通过以上代码即可创建es索引
写入一条数据
写入数据需要根据 创建的es索引类型对应的数据结构写入:
from elasticsearch import Elasticsearch
es = Elasticsearch('192.168.1.1:9200')
action ={
"id": "1111122222",
"serial":"版本",
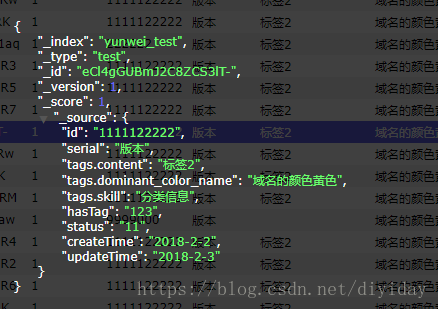
#以下tags.content是错误的写法
#"tags.content" :"标签2",
#"tags.dominant_color_name": "域名的颜色黄色",
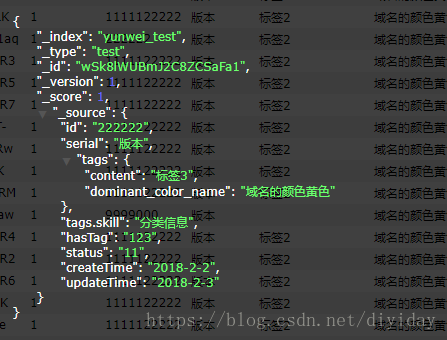
#正确的写法如下:
"tags":{"content":"标签3","dominant_color_name": "域名的颜色黄色"},
#按照字典的格式写入,如果用上面的那种写法,会直接写成一个tags.content字段。
#而不是在tags中content添加数据,这点需要注意
"tags.skill":"分类信息",
"hasTag":"123",
"status":"11",
"createTime" :"2018-2-2",
"updateTime":"2018-2-3",
}
es.index(index="index_test",doc_type="doc_type_test",body = action)
即可写入一条数据
错误的写入
正确的写入
写入多条数据
from elasticsearch import Elasticsearch
from elasticsearch.helpers import bulk
es = Elasticsearch('192.168.1.1:9200')
ACTIONS = []
action1 ={
          "_index": "indes_test",
          "_type": "doc_type_test",
          "_id":"bSlegGUBmJ2C8ZCSC1R1",
          "_source":{
            "id": "1111122222",
            "serial":"版本",
            "tags.content" :"标签2",
            "tags.dominant_color_name": "域名的颜色黄色",
            "tags.skill":"分类信息",
            "hasTag":"123",
            "status":"11",
            "createTime" :"2018-2-2",
            "updateTime":"2018-2-3",
          }
        }
action2 ={
          "_index": "indes_test",
          "_type": "doc_type_test",
          "_id":"bSlegGUBmJ2C8ZCSC1R2",
          "_source":{
            "id": "1111122222",
            "serial":"版本",
            "tags.content" :"标签2",
            "tags.dominant_color_name": "域名的颜色黄色",
            "tags.skill":"分类信息",
            "hasTag":"123",
            "status":"11",
            "createTime" :"2018-2-2",
            "updateTime":"2018-2-3",
          }
        }
ACTIONS.append(action1)
ACTIONS.append(action2)
res,_ =bulk(es, ACTIONS, index="indes_test", raise_on_error=True)
print(res)
这个方式是手动指定了id,如果把”_id”这个参数去掉即可自动生成id数据.
如下:
action2 ={
          "_index": "indes_test",
          "_type": "doc_type_test",
          "_source":{
            "id": "1111122222",
            "serial":"版本",
            "tags.content" :"标签2",
            "tags.dominant_color_name": "域名的颜色黄色",
            "tags.skill":"分类信息",
            "hasTag":"123",
            "status":"11",
            "createTime" :"2018-2-2",
            "updateTime":"2018-2-3",
          }
        }
删除一条数据
from elasticsearch import Elasticsearch
es = Elasticsearch('192.168.1.1:9200')
res = es.delete(index="index_test",doc_type="doc_type_test", id ="bSlegGUBmJ2C8ZCSC1R1")
print(res)
直接替换id的即可删除所需的id
查询一条数据
from elasticsearch import Elasticsearch
es = Elasticsearch('192.168.1.1:9200')
res = es.get(index="index_test",doc_type="doc_type_test", id ="bSlegGUBmJ2C8ZCSC1R2")
print(res)
直接替换id的即可查询所需的id
查询所有数据
from elasticsearch import Elasticsearch

es = Elasticsearch('192.168.1.1:9200')

res = es.search(index="index_test",doc_type="doc_type_test")
print(res)
print(res['hits']['hits'])
通过['hits']参数,可以解析出查询数据的详细内容
根据关键词查找
from elasticsearch import Elasticsearch
es = Elasticsearch('192.168.1.1:9200')
doc = {
      "query": {
        "match": {
          "_id": "aSlZgGUBmJ2C8ZCSPVRO"
        }
      }
    }
res = es.search(index="index_test",doc_type="doc_type_test",body=doc)
print(res)
总结
所述是小编给大家介绍的python elasticsearch从创建索引到写入数据的全过程,希望对大家有所帮助,如果大家有任何疑问欢迎给我留言,小编会及时回复大家的!