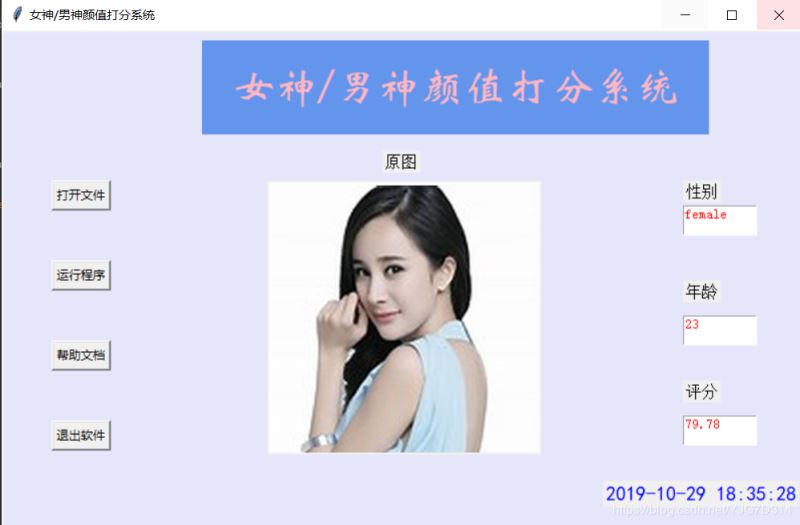
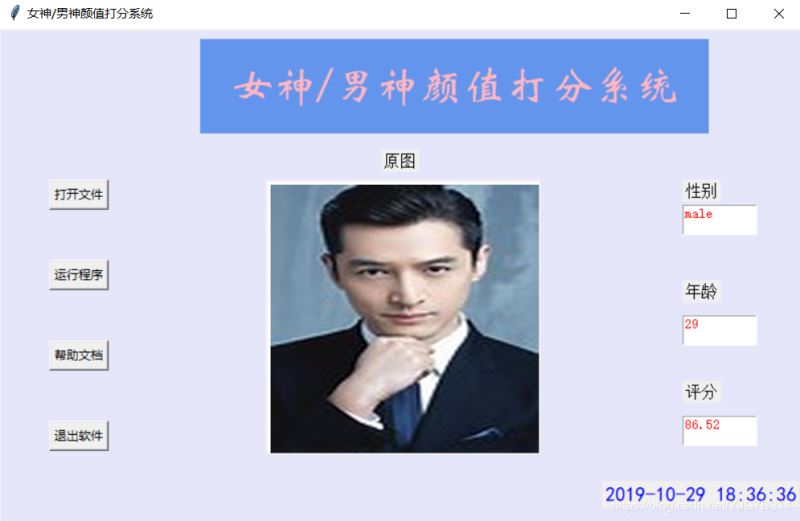
使用python实现男神女神颜值打分系统(推荐)
先给大家展示效果图,感觉不错,请参考实现代码。
具体代码如下所示:
#!/usr/bin/env python
# -*- coding:utf-8 -*-
"""
pip install pillow
pip install baidu-aip
pip install tkinter
"""
import PIL
import time
import base64
import tkinter as tk
from PIL import Image
from PIL import ImageTk
from aip import AipFace
from tkinter.filedialog import askopenfilename
# 配置百度aip参数
APP_ID = '15768642'
API_KEY = 'xhiiGmGPRCRj10XIqVlVeCky'
SECRET_KEY = 'ZDMMAO7StwTKzW8BspVQxvoGtdgSW4yI'
a_face = AipFace(APP_ID, API_KEY, SECRET_KEY)
image_type = 'BASE64'
options = {'face_field': 'age,gender,beauty'}
def get_file_content(file_path):
  """获取文件内容"""
  with open(file_path, 'rb') as fr:
    content = base64.b64encode(fr.read())
    return content.decode('utf8')
def face_score(file_path):
  """脸部识别分数"""
  result = a_face.detect(get_file_content(file_path), image_type, options)
  print(result)
  age = result['result']['face_list'][0]['age']
  beauty = result['result']['face_list'][0]['beauty']
  gender = result['result']['face_list'][0]['gender']['type']
  return age, beauty, gender
class ScoreSystem():
  """打分系统类"""
  root = tk.Tk()
  # 修改程序框的大小
  root.geometry('800x500')
  # 添加程序框标题
  root.title('女神/男神颜值打分系统')
  # 修改背景色
  canvas = tk.Canvas(root,
            width=800, # 指定Canvas组件的宽度
            height=500, # 指定Canvas组件的高度
            bg='#E6E6FA') # 指定Canvas组件的背景色
  canvas.pack()
  def start_interface(self):
    """主运行函数"""
    self.title()
    self.time_component()
    # 打开本地文件
    tk.Button(self.root, text='打开文件', command=self.show_original_pic).place(x=50, y=150)
    # 进行颜值评分
    tk.Button(self.root, text='运行程序', command=self.open_files2).place(x=50, y=230)
    # 显示帮助文档
    tk.Button(self.root, text='帮助文档', command=self.show_help).place(x=50, y=310)
    # 退出系统
    tk.Button(self.root, text='退出软件', command=self.quit).place(x=50, y=390)
    # 显示图框标题
    tk.Label(self.root, text='原图', font=10).place(x=380, y=120)
    # 修改图片大小
    self.label_img_original = tk.Label(self.root)
    # 设置显示图框背景
    self.cv_orinial = tk.Canvas(self.root, bg='white', width=270, height=270)
    # 设置显示图框边框
    self.cv_orinial.create_rectangle(8, 8, 260, 260, width=1, outline='red')
    # 设置位置
    self.cv_orinial.place(x=265, y=150)
    # 显示图片位置
    self.label_img_original.place(x=265, y=150)
    # 设置评分标签
    tk.Label(self.root, text='性别', font=10).place(x=680, y=150)
    self.text1 = tk.Text(self.root, width=10, height=2)
    tk.Label(self.root, text='年龄', font=10).place(x=680, y=250)
    self.text2 = tk.Text(self.root, width=10, height=2)
    tk.Label(self.root, text='评分', font=10).place(x=680, y=350)
    self.text3 = tk.Text(self.root, width=10, height=2)
    # 填装文字
    self.text1.place(x=680, y=175)
    self.text2.place(x=680, y=285)
    self.text3.place(x=680, y=385)
    # 开启循环
    self.root.mainloop()
  def show_original_pic(self):
    """放入文件"""
    self.path_ = askopenfilename(title='选择文件')
    # 处理文件
    img = Image.open(fr'{self.path_}')
    img = img.resize((270, 270), PIL.Image.ANTIALIAS) # 调整图片大小至270*270
    # 生成tkinter图片对象
    img_png_original = ImageTk.PhotoImage(img)
    # 设置图片对象
    self.label_img_original.config(image=img_png_original)
    self.label_img_original.image = img_png_original
    self.cv_orinial.create_image(5, 5, anchor='nw', image=img_png_original)
  def open_files2(self):
    # 获取百度API接口获得的年龄、分数、性别
    age, score, gender = face_score(self.path_)
    # 清楚text文本框内容并进行插入
    self.text1.delete(1.0, tk.END)
    self.text1.tag_config('red', foreground='RED')
    self.text1.insert(tk.END, gender, 'red')
    self.text2.delete(1.0, tk.END)
    self.text2.tag_config('red', foreground='RED')
    self.text2.insert(tk.END, age, 'red')
    self.text3.delete(1.0, tk.END)
    self.text3.tag_config('red', foreground='RED')
    self.text3.insert(tk.END, score, 'red')
  def show_help(self):
    """显示帮助"""
    pass
  def quit(self):
    """退出"""
    self.root.quit()
  def get_time(self, lb):
    """获取时间"""
    time_str = time.strftime("%Y-%m-%d %H:%M:%S") # 获取当前的时间并转化为字符串
    lb.configure(text=time_str) # 重新设置标签文本
    self.root.after(1000, self.get_time, lb) # 每隔1s调用函数 get_time自身获取时间
  def time_component(self):
    """时间组件"""
    lb = tk.Label(self.root, text='', fg='blue', font=("黑体", 15))
    lb.place(relx=0.75, rely=0.90)
    self.get_time(lb)
  def title(self):
    """标题设计"""
    lb = tk.Label(self.root, text='女神/男神颜值打分系统',
           bg='#6495ED',
           fg='lightpink', font=('华文新魏', 32),
           width=20,
           height=2,
           # relief=tk.SUNKEN
           )
    lb.place(x=200, y=10)
score_system = ScoreSystem()
score_system.start_interface()
总结
以上所述是小编给大家介绍的使用python实现男神女神颜值打分系统,希望对大家有所帮助,如果大家有任何疑问请给我留言,小编会及时回复大家的。在此也非常感谢大家对【听图阁-专注于Python设计】网站的支持!
如果你觉得本文对你有帮助,欢迎转载,烦请注明出处,谢谢!