Windows系统下使用flup搭建Nginx和Python环境的方法
首先确保你的电脑里已经安装了Python和Django,接下来我们还需要两个组件,nginx服务器和flup(Python的FastCGI组件)
nginx下载地址:http://nginx.org/en/download.html
flup下载地址:http://www.saddi.com/software/flup/dist/flup-1.0.2.tar.gz
与Linux下不同的是,nginx在windows下是以一个应用程序的方式运行,而不是以一个服务运行(难怪没人在windows服务器上用nginx)
把刚刚下载好的两个压缩包都解压到C:\nginx\, C:\flup\(目录可自己选择,这里只做个演示)然后用python setup.py install 命令
安装flup,接着就要配置nginx了,打开C:\nginx\conf\nginx.conf,我的配置文件如下,大家可根据需要自行修改:
#user nobody;
worker_processes 1;

#error_log logs/error.log;
#error_log logs/error.log notice;
#error_log logs/error.log info;

#pid    logs/nginx.pid;


events {
  worker_connections 1024;
}


http {
  include    mime.types;
  default_type application/octet-stream;

  #log_format main '$remote_addr - $remote_user [$time_local] "$request" '
  #         '$status $body_bytes_sent "$http_referer" '
  #         '"$http_user_agent" "$http_x_forwarded_for"';

  #access_log logs/access.log main;

  sendfile    on;
  #tcp_nopush   on;

  #keepalive_timeout 0;
  keepalive_timeout 65;

  #gzip on;

  server {
    listen    80;
    server_name localhost;

    #charset koi8-r;

    #access_log logs/host.access.log main;

    location / {
      root  html;
      index index.html index.htm;
    }

    #error_page 404       /404.html;

    # redirect server error pages to the static page /50x.html
    #
    error_page  500 502 503 504 /50x.html;
    location = /50x.html {
      root  html;
    }

    # proxy the PHP scripts to Apache listening on 127.0.0.1:80
    #
    #location ~ \.php$ {
    #  proxy_pass  http://127.0.0.1;
    #}

    # pass the PHP scripts to FastCGI server listening on 127.0.0.1:9000
    #
    #location ~ \.php$ {
    #  root      html;
    #  fastcgi_pass  127.0.0.1:9000;
    #  fastcgi_index index.php;
    #  fastcgi_param SCRIPT_FILENAME /scripts$fastcgi_script_name;
    #  include    fastcgi_params;
    #}

    # deny access to .htaccess files, if Apache's document root
    # concurs with nginx's one
    #
    #location ~ /\.ht {
    #  deny all;
    #}

    # 静态资源
    location ~* ^.+\.(html|jpg|jpeg|gif|png|ico|css|js)$
    {
      root e:/gin/gin/;
      expires 30d;
      break;
    }

    location ~ ^/static/ {
      root e:/gin/gin/;
      expires 30d;
      break;
    }

    location ~ ^/ {
      # 指定 fastcgi 的主机和端口
      fastcgi_pass 127.0.0.1:8051;
      fastcgi_param PATH_INFO $fastcgi_script_name;
      fastcgi_param REQUEST_METHOD $request_method;
      fastcgi_param QUERY_STRING $query_string;
      fastcgi_param CONTENT_TYPE $content_type;
      fastcgi_param CONTENT_LENGTH $content_length;
      fastcgi_param SERVER_PROTOCOL $server_protocol;
      fastcgi_param SERVER_PORT $server_port;
      fastcgi_param SERVER_NAME $server_name;
      fastcgi_pass_header Authorization;
      fastcgi_intercept_errors off;
    }
  }

  # another virtual host using mix of IP-, name-, and port-based configuration
  #
  #server {
  #  listen    8000;
  #  listen    somename:8080;
  #  server_name somename alias another.alias;

  #  location / {
  #    root  html;
  #    index index.html index.htm;
  #  }
  #}


  # HTTPS server
  #
  #server {
  #  listen    443;
  #  server_name localhost;

  #  ssl         on;
  #  ssl_certificate   cert.pem;
  #  ssl_certificate_key cert.key;

  #  ssl_session_timeout 5m;

  #  ssl_protocols SSLv2 SSLv3 TLSv1;
  #  ssl_ciphers HIGH:!aNULL:!MD5;
  #  ssl_prefer_server_ciphers  on;

  #  location / {
  #    root  html;
  #    index index.html index.htm;
  #  }
  #}

}
需要注意的是,对于不需要url rewrite的目录,比如存放css和图片的目录,需要在配置文件里指明,否则将无法访问这些文件
    location ~ ^/static/ {
      root e:/gin/gin/;
      expires 30d;
      break;
    }
最后一步就是运行nginx服务器,并且用FastCGI运行你的Django项目了
进入nginx的目录:
  cd c:\nginx\
  start nginx
然后在浏览器里访问http://loaclhost/ 就应该可以看到nginx的欢迎界面了。最后进入你的Django项目的根目录,然后用一下命令来运行服务器:
python manage.py runfcgi method=threaded host=127.0.0.1 port=8051
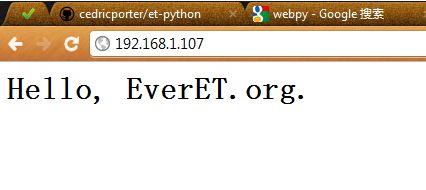
刷新localhost页面,你就能看到你的项目主页啦~~
补充一点windwos下nginx操作的命令(来自官方文档)
nginx -s stop quick exit
nginx -s quit graceful quit
nginx -s reload changing configuration, starting a new worker, quitting an old worker gracefully
nginx -s reopen reopening log files
大功告成,开始django之旅,ohye!!!