python实现机器人卡牌
介绍
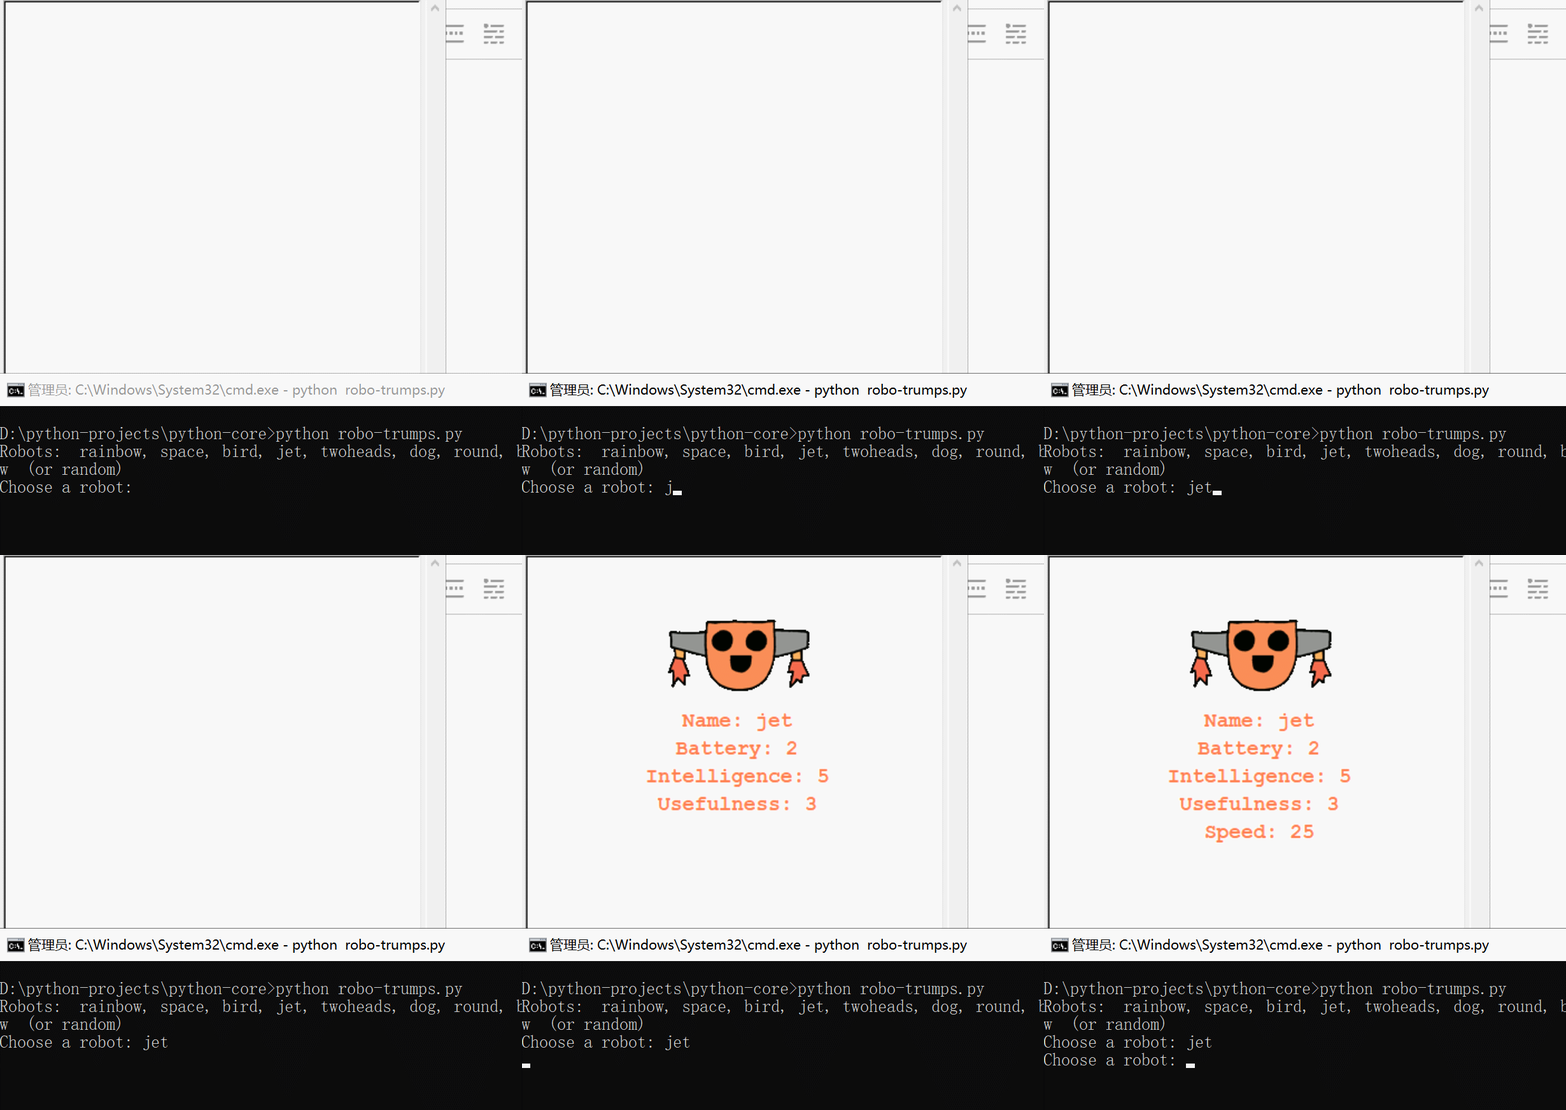
这个例子主要利用turtle库实现根据输入动态展示不同机器人的图像和属性信息。
代码部分非原创只是做了些许修改和整理使得更易阅读。
图片和文件资源请访问git仓库获取:链接地址
涉及以下知识点:
1.文件读取
2.字典
3.turtle库的使用
4.控制语句
实现的效果
代码
#!/bin/python3

from turtle import *
from random import choice

screen = Screen()
screen.setup(400, 400)
screen.bgcolor('white')
penup()
hideturtle()
robots = {}

file = open('resource/cards.txt', 'r')

# 将文件中机器人信息装载到字典中
for line in file.read().splitlines():
 name, battery, intelligence, usefulness, speed, image, colour = line.split(', ')
 robots[name] = [battery, intelligence, usefulness, speed, image, colour]
 screen.register_shape('img/' + image)
file.close()

print('Robots: ', ', '.join(robots.keys()), ' (or random)')

while True:
 robot = input("Choose a robot: ")
 if robot == "random":
 robot = choice(list(robots.keys()))
 print(robot)

 if robot in robots:
 stats = robots[robot]
 style = ('Courier', 14, 'bold')
 clear()
 color(stats[5])
 goto(0, 100)
 shape('img/' + stats[4])
 setheading(90)
 # 将当前位置上的形状复制到画布上
 stamp()
 setheading(-90)
 forward(70)
 write('Name: ' + robot, font=style, align='center')
 forward(25)
 write('Battery: ' + stats[0], font=style, align='center')
 forward(25)
 write('Intelligence: ' + stats[1], font=style, align='center')
 forward(25)
 write('Usefulness: ' + stats[2], font=style, align='center')
 forward(25)
 write('Speed: ' + stats[3], font=style, align='center')
 else:
 print("Robot doesn't exist!")
以上就是本文的全部内容,希望对大家的学习有所帮助,也希望大家多多支持【听图阁-专注于Python设计】。