selenium+Chrome滑动验证码破解二(某某网站)
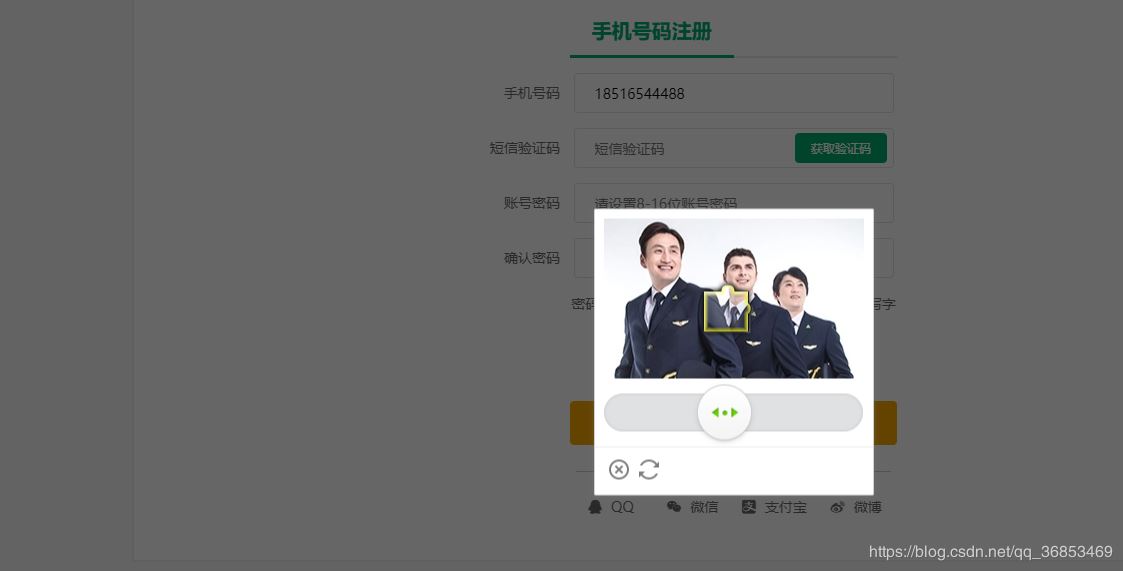
具体详情见代码,研究网站,随便输入手机号点击获取验证码
在自己写代码前参考了一批博客,是把所有验证码图片截取所有验证码图片保存在本地,再对比,感觉方法不行,所以自己写了个破解方法,通过js修改css直接抓取完整图片,因为上一篇写了B站,这里就不一一分析了,直接上代码:
破解成功界面
完整代码:
# -*- coding:utf-8 -*-
'''
研究网站: https://account.ch.com/NonRegistrations-Regist
滑块验证码也分两种:
  1.直接给缺口图片,先滑动到缺口找到完整验证码图片,对比有缺口的验证码图片,然后计算缺口坐标,再利用selenium移动按钮到指定位置
  2.直接给原图,缺口需要点击出现,直接保存原图,然后对比
'''
from selenium import webdriver
from selenium.webdriver.support.wait import WebDriverWait
from selenium.webdriver.support import expected_conditions as EC
from selenium.webdriver.common.by import By
from selenium.webdriver import ActionChains
from lxml.html import etree
from PIL import Image
from time import sleep
import re, requests
from urllib.request import urlretrieve
from bs4 import BeautifulSoup

class SliderVerificationCode(object):
  def __init__(self): # 初始化一些信息
    self.left = 60 # 定义一个左边的起点 缺口一般离图片左侧有一定的距离 有一个滑块
    self.url = 'https://account.ch.com/NonRegistrations-Regist'
    self.chromedriverPath = "C:\Program Files (x86)\Google\Chrome\Application\chromedriver.exe"
    self.driver = webdriver.Chrome(executable_path=self.chromedriverPath)
    self.wait = WebDriverWait(self.driver, 20) # 设置等待时间20秒
    self.phone = "18516544488"

  def input_name_password(self): # 输入手机号
    self.driver.get(self.url)
    self.driver.maximize_window()
    self.inputphone = self.wait.until(EC.presence_of_element_located((By.NAME, 'phoneNumberInput')))
    self.inputphone.send_keys(self.phone)


  def click_login_button(self): # 点击登录按钮,出现验证码图片
    login_button = self.wait.until(EC.element_to_be_clickable((By.ID, 'getDynamicPwd')))
    login_button.click()
    sleep(1)

  def get_geetest_image(self): # 获取验证码图片
    # print(self.driver.page_source)
    gapimg = self.wait.until(EC.presence_of_element_located((By.CLASS_NAME, 'geetest_canvas_bg')))
    sleep(2)
    gapimg.screenshot(r'./captcha1.png')
    # 通过js代码修改标签样式 显示图片2
    js = 'var change = document.getElementsByClassName("geetest_canvas_fullbg");change[0].style = "display:block;"'
    self.driver.execute_script(js)
    sleep(2)
    fullimg = self.wait.until(
      EC.presence_of_element_located((By.CLASS_NAME, 'geetest_canvas_fullbg')))
    fullimg.screenshot(r'./captcha2.png')

  def is_similar(self, image1, image2, x, y):
    '''判断两张图片 各个位置的像素是否相同
    #image1:带缺口的图片
    :param image2: 不带缺口的图片
    :param x: 位置x
    :param y: 位置y
    :return: (x,y)位置的像素是否相同
    '''
    # 获取两张图片指定位置的像素点
    pixel1 = image1.load()[x, y]
    pixel2 = image2.load()[x, y]
    # 设置一个阈值 允许有误差
    threshold = 60
    # 彩色图 每个位置的像素点有三个通道
    if abs(pixel1[0] - pixel2[0]) < threshold and abs(pixel1[1] - pixel2[1]) < threshold and abs(
        pixel1[2] - pixel2[2]) < threshold:
      return True
    else:
      return False

  def get_diff_location(self): # 获取缺口图起点
    captcha1 = Image.open('captcha1.png')
    captcha2 = Image.open('captcha2.png')
    for x in range(self.left, captcha1.size[0]): # 从左到右 x方向
      for y in range(captcha1.size[1]): # 从上到下 y方向
        if not self.is_similar(captcha1, captcha2, x, y):
          return x # 找到缺口的左侧边界 在x方向上的位置

  def get_move_track(self, gap):
    track = [] # 移动轨迹
    current = 0 # 当前位移
    # 减速阈值
    mid = gap * 4 / 5 # 前4/5段加速 后1/5段减速
    t = 0.2 # 计算间隔
    v = 0 # 初速度
    while current < gap:
      if current < mid:
        a = 3 # 加速度为+3
      else:
        a = -3 # 加速度为-3
      v0 = v # 初速度v0
      v = v0 + a * t # 当前速度
      move = v0 * t + 1 / 2 * a * t * t # 移动距离
      current += move # 当前位移
      track.append(round(move)) # 加入轨迹
    return track

  def move_slider(self, track):
    slider = self.wait.until(EC.presence_of_element_located((By.CSS_SELECTOR, '.geetest_slider_button')))
    ActionChains(self.driver).click_and_hold(slider).perform()
    for x in track: # 只有水平方向有运动 按轨迹移动
      ActionChains(self.driver).move_by_offset(xoffset=x, yoffset=0).perform()
    sleep(1)
    ActionChains(self.driver).release().perform() # 松开鼠标

  def main(self):
    self.input_name_password()
    self.click_login_button()
    self.get_geetest_image()
    gap = self.get_diff_location() # 缺口左起点位置
    gap = gap - 6 # 减去滑块左侧距离图片左侧在x方向上的距离 即为滑块实际要移动的距离
    track = self.get_move_track(gap)
    print("移动轨迹", track)
    self.move_slider(track)


if __name__ == "__main__":
  springAutumn = SliderVerificationCode()
  springAutumn.main()
以上就是本文的全部内容,希望对大家的学习有所帮助,也希望大家多多支持【听图阁-专注于Python设计】。
