pytorch实现建立自己的数据集(以mnist为例)
本文将原始的numpy array数据在pytorch下封装为Dataset类的数据集,为后续深度网络训练提供数据。
加载并保存图像信息
首先导入需要的库,定义各种路径。
import os
import matplotlib
from keras.datasets import mnist
import numpy as np
from torch.utils.data.dataset import Dataset
from PIL import Image
import scipy.misc

root_path = 'E:/coding_ex/pytorch/Alexnet/data/'
base_path = 'baseset/'
training_path = 'trainingset/'
test_path = 'testset/'
这里将数据集分为三类,baseset为所有数据(trainingset+testset),trainingset是训练集,testset是测试集。直接通过keras.dataset加载mnist数据集,不能自动下载的话可以手动下载.npz并保存至相应目录下。
def LoadData(root_path, base_path, training_path, test_path):
  (x_train, y_train), (x_test, y_test) = mnist.load_data()
  x_baseset = np.concatenate((x_train, x_test))
  y_baseset = np.concatenate((y_train, y_test))
  train_num = len(x_train)
  test_num = len(x_test)

  #baseset
  file_img = open((os.path.join(root_path, base_path)+'baseset_img.txt'),'w')
  file_label = open((os.path.join(root_path, base_path)+'baseset_label.txt'),'w')
  for i in range(train_num + test_num):
    file_img.write(root_path + base_path + 'img/' + str(i) + '.png\n') #name
    file_label.write(str(y_baseset[i])+'\n') #label
#    scipy.misc.imsave(root_path + base_path + '/img/'+str(i) + '.png', x_baseset[i])
    matplotlib.image.imsave(root_path + base_path + 'img/'+str(i) + '.png', x_baseset[i])
  file_img.close()
  file_label.close()

  #trainingset
  file_img = open((os.path.join(root_path, training_path)+'trainingset_img.txt'),'w')
  file_label = open((os.path.join(root_path, training_path)+'trainingset_label.txt'),'w')
  for i in range(train_num):
    file_img.write(root_path + training_path + 'img/' + str(i) + '.png\n') #name
    file_label.write(str(y_train[i])+'\n') #label
#    scipy.misc.imsave(root_path + training_path + '/img/'+str(i) + '.png', x_train[i])
    matplotlib.image.imsave(root_path + training_path + 'img/'+str(i) + '.png', x_train[i])
  file_img.close()
  file_label.close()

  #testset
  file_img = open((os.path.join(root_path, test_path)+'testset_img.txt'),'w')
  file_label = open((os.path.join(root_path, test_path)+'testset_label.txt'),'w')
  for i in range(test_num):
    file_img.write(root_path + test_path + 'img/' + str(i) + '.png\n') #name
    file_label.write(str(y_test[i])+'\n') #label
#    scipy.misc.imsave(root_path + test_path + '/img/'+str(i) + '.png', x_test[i])
    matplotlib.image.imsave(root_path + test_path + 'img/'+str(i) + '.png', x_test[i])
  file_img.close()
  file_label.close()
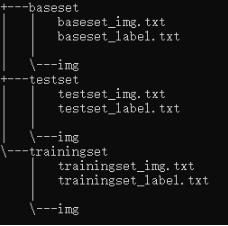
使用这段代码时,需要建立相应的文件夹及.txt文件,./data文件夹结构如下:
/img文件夹
由于mnist数据集其实是灰度图,这里用matplotlib保存的图像是伪彩色图像。
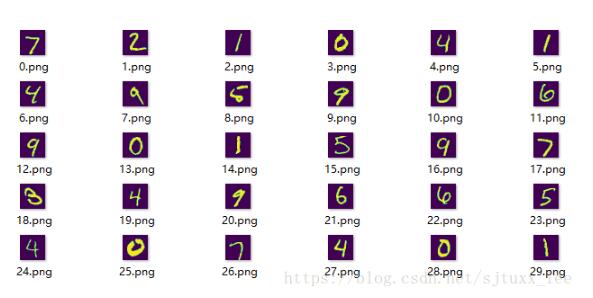
如果用scipy.misc.imsave的话保存的则是灰度图像。
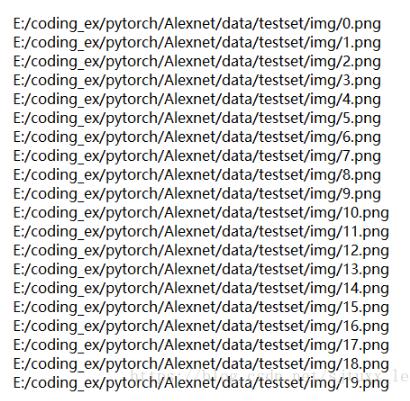
xxx_img.txt文件
xxx_img.txt文件中存放的是每张图像的名字
xxx_label.txt文件
xxx_label.txt文件中存放的是类别标记

这里记得保存的时候一行为一个图像信息,便于后续读取。
定义自己的Dataset类
pytorch训练数据时需要数据集为Dataset类,便于迭代等等,这里将加载保存之后的数据封装成Dataset类,继承该类需要写初始化方法(__init__),获取指定下标数据的方法__getitem__),获取数据个数的方法(__len__)。这里尤其需要注意的是要把label转为LongTensor类型的。
class DataProcessingMnist(Dataset):
  def __init__(self, root_path, imgfile_path, labelfile_path, imgdata_path, transform = None):
    self.root_path = root_path
    self.transform = transform
    self.imagedata_path = imgdata_path
    img_file = open((root_path + imgfile_path),'r')
    self.image_name = [x.strip() for x in img_file]
    img_file.close()
    label_file = open((root_path + labelfile_path), 'r')
    label = [int(x.strip()) for x in label_file]
    label_file.close()
    self.label = torch.LongTensor(label)#这句很重要,一定要把label转为LongTensor类型的

  def __getitem__(self, idx):
    image = Image.open(str(self.image_name[idx]))
    image = image.convert('RGB')
    if self.transform is not None:
      image = self.transform(image)
    label = self.label[idx]
    return image, label
  def __len__(self):
    return len(self.image_name)
定义完自己的类之后可以测试一下。
  LoadData(root_path, base_path, training_path, test_path)
  training_imgfile = training_path + 'trainingset_img.txt'
  training_labelfile = training_path + 'trainingset_label.txt'
  training_imgdata = training_path + 'img/'
  #实例化一个类
  dataset = DataProcessingMnist(root_path, training_imgfile, training_labelfile, training_imgdata)
得到图像名称
name = dataset.image_name
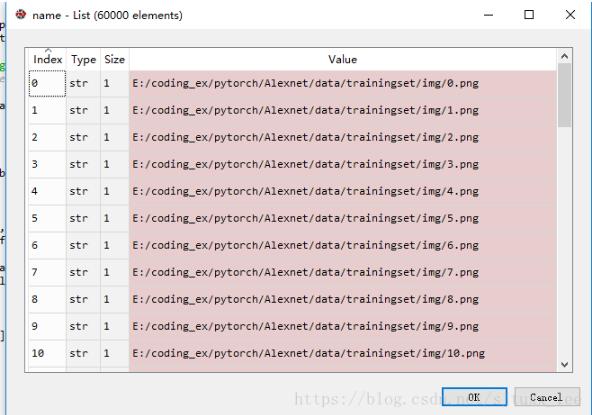
这里我们可以单独输出某一个名称看一下是否有换行符
print(name[0])
>>>'E:/coding_ex/pytorch/Alexnet/data/trainingset/img/0.png'
如果定义类的时候self.image_name = [x.strip() for x in img_file]这句没有strip掉,则输出的值将为'E:/coding_ex/pytorch/Alexnet/data/trainingset/img/0.png\n'
获取固定下标的图像
im, label = dataset.__getitem__(0)
得到结果

以上这篇pytorch实现建立自己的数据集(以mnist为例)就是小编分享给大家的全部内容了,希望能给大家一个参考,也希望大家多多支持【听图阁-专注于Python设计】。