php 服务器调试 Zend Debugger 的安装教程
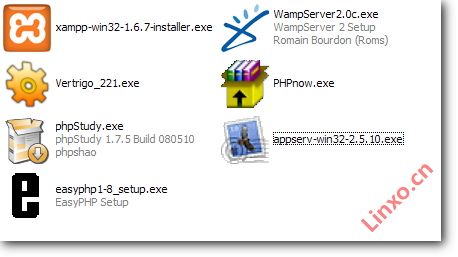
远程调试需要服务器端的组件支持,我们今天的内容就是怎么来安装这个服务器端调试环境,用到的调试组件是Zend Debugger,它是轻便而且够用的,在撰写本文时,其最新版本是5.2.14,与网络上广为流传的5.2.10版略有更新。我的服务器是windows下的apache,因此我就下载了windows版的Zend Debugger,下来的压缩包大约2.1M,有个readme.txt,我觉得有必要看哈子:
Zend Debugger installation instructions
—————————————
1. Locate ZendDebugger.so or ZendDebugger.dll file that is compiled for the correct version of PHP (4.3.x, 4.4.x, 5.0.x, 5.1.x, 5.2.x) in the appropriate directory.
2. Add the following line to the php.ini file:
Linux and Mac OS X: zend_extension=/full/path/to/ZendDebugger.so
Windows: zend_extension_ts=/full/path/to/ZendDebugger.dll
Windows non-tread safe: zend_extension=/full/path/to/ZendDebugger.dll
(*) the windows non-thread safe is used only with Zend Core 2.0
3. Add the following lines to the php.ini file:
zend_debugger.allow_hosts=<ip_addresses>
zend_debugger.expose_remotely=always
4. Place dummy.php file in the document root directory.
5. Restart web server.
这里已经非常详细的讲了安装方法了,那我就以我晦涩的语言再描述一遍吧
以下是压缩包内所有文件的列表:
ZendDebugger-5.2.14RC9-cygwin_nt-i386\md5
ZendDebugger-5.2.14RC9-cygwin_nt-i386\Inventory.xml
ZendDebugger-5.2.14RC9-cygwin_nt-i386\4_3_x_comp
ZendDebugger-5.2.14RC9-cygwin_nt-i386\4_3_x_comp\ZendDebugger.dll
ZendDebugger-5.2.14RC9-cygwin_nt-i386\4_4_x_comp
ZendDebugger-5.2.14RC9-cygwin_nt-i386\4_4_x_comp\ZendDebugger.dll
ZendDebugger-5.2.14RC9-cygwin_nt-i386\5_0_x_comp
ZendDebugger-5.2.14RC9-cygwin_nt-i386\5_0_x_comp\ZendDebugger.dll
ZendDebugger-5.2.14RC9-cygwin_nt-i386\5_1_x_comp
ZendDebugger-5.2.14RC9-cygwin_nt-i386\5_1_x_comp\ZendDebugger.dll
ZendDebugger-5.2.14RC9-cygwin_nt-i386\5_2_x_comp
ZendDebugger-5.2.14RC9-cygwin_nt-i386\5_2_x_comp\ZendDebugger.dll
ZendDebugger-5.2.14RC9-cygwin_nt-i386\5_2_x_nts_comp
ZendDebugger-5.2.14RC9-cygwin_nt-i386\5_2_x_nts_comp\ZendDebugger.dll
ZendDebugger-5.2.14RC9-cygwin_nt-i386\dummy.php
ZendDebugger-5.2.14RC9-cygwin_nt-i386\README.txt
解压出合适的也就是和你当前php的版本对应的Zend Debugger版本,我的php版本是5.2.5,因此我就把5_2_x_comp给拖出来了(至于5_2_x_nts_comp指的是non-tread safe,没有明白具体用途,也就不妄用了),我将5_2_x_comp\ZendDebugger.dll移动到D:\myserver\ZendDebugger\5_2_x\ZendDebugger.dll,将压缩包中的dummy.php解压到web根目录,我这里的apache的DocumentRoot设置在D:/myserver,就拷贝dummy.php到D:\myserver\wwwroot,然后修改php.ini,加入了这些内容:
zend_extension_ts=D:/myserver/ZendDebugger/5_2_x/ZendDebugger.dll
zend_debugger.allow_hosts=127.0.0.1/32,192.168.1.88/24
zend_debugger.expose_remotely=always
然后重启apache,在略微的等待之后,我们输入phpinfo()查看成功与否?
啊哈,运行的很好的嘛~
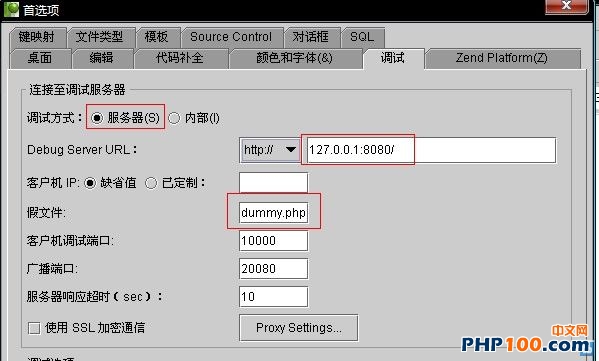
下面打开ZDE,工具菜单->首选项,选择调试选项卡,设置调试方式为服务器,Debug Server URL填写web服务器的URL,我这里apache的端口是8080,如果是默认80端口,就可以省略了,OK,设置完成,确定之(如图)
选择 工具->检查Debug Server连接,出来的对话框选择是,我们看到了连接成功的提示
至此,我们的Debug Server就算成功安装完成了,关于如何使用Zend Studio的服务器调试,后面的教程会详细阐述,敬请期待哦。