Python编程实现的简单神经网络算法示例
本文实例讲述了Python编程实现的简单神经网络算法。分享给大家供大家参考,具体如下:
python实现二层神经网络
包括输入层和输出层
# -*- coding:utf-8 -*-
#! python2
import numpy as np
#sigmoid function
def nonlin(x, deriv = False):
 if(deriv == True):
  return x*(1-x)
 return 1/(1+np.exp(-x))
#input dataset
x = np.array([[0,0,1],
    [0,1,1],
    [1,0,1],
    [1,1,1]])
#output dataset
y = np.array([[0,0,1,1]]).T
np.random.seed(1)
#init weight value
syn0 = 2*np.random.random((3,1))-1
print "【听图阁-专注于Python设计】测试结果:"
for iter in xrange(100000):
 l0 = x       #the first layer,and the input layer
 l1 = nonlin(np.dot(l0,syn0)) #the second layer,and the output layer
 l1_error = y-l1
 l1_delta = l1_error*nonlin(l1,True)
 syn0 += np.dot(l0.T, l1_delta)
print "outout after Training:"
print l1
这里,
l0:输入层
l1:输出层
syn0:初始权值
l1_error:误差
l1_delta:误差校正系数
func nonlin:sigmoid函数
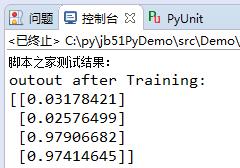
这里迭代次数为100时,预测结果为
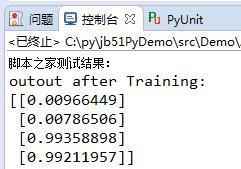
迭代次数为1000时,预测结果为:
迭代次数为10000,预测结果为:
迭代次数为100000,预测结果为:
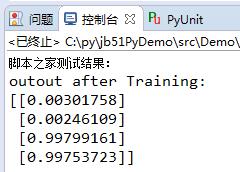
可见迭代次数越多,预测结果越接近理想值,当时耗时也越长。
python实现三层神经网络
包括输入层、隐含层和输出层
# -*- coding:utf-8 -*-
#! python2
import numpy as np
def nonlin(x, deriv = False):
if(deriv == True):
return x*(1-x)
else:
return 1/(1+np.exp(-x))
#input dataset
X = np.array([[0,0,1],
[0,1,1],
[1,0,1],
[1,1,1]])
#output dataset
y = np.array([[0,1,1,0]]).T
syn0 = 2*np.random.random((3,4)) - 1 #the first-hidden layer weight value
syn1 = 2*np.random.random((4,1)) - 1 #the hidden-output layer weight value
print "【听图阁-专注于Python设计】测试结果:"
for j in range(60000):
l0 = X #the first layer,and the input layer
l1 = nonlin(np.dot(l0,syn0)) #the second layer,and the hidden layer
l2 = nonlin(np.dot(l1,syn1)) #the third layer,and the output layer
l2_error = y-l2 #the hidden-output layer error
if(j%10000) == 0:
print "Error:"+str(np.mean(l2_error))
l2_delta = l2_error*nonlin(l2,deriv = True)
l1_error = l2_delta.dot(syn1.T) #the first-hidden layer error
l1_delta = l1_error*nonlin(l1,deriv = True)
syn1 += l1.T.dot(l2_delta)
syn0 += l0.T.dot(l1_delta)
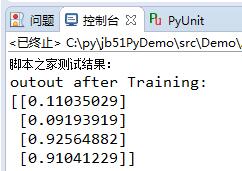
print "outout after Training:"
print l2
运行结果:

更多关于Python相关内容感兴趣的读者可查看本站专题:《Python数据结构与算法教程》、《Python编码操作技巧总结》、《Python函数使用技巧总结》、《Python字符串操作技巧汇总》及《Python入门与进阶经典教程》
希望本文所述对大家Python程序设计有所帮助。