python实现自主查询实时天气
本文实例为大家分享了python实现自主查询实时天气的具体代码,供大家参考,具体内容如下
用到了urllib2 json 很简单的一个应用 如下
获取城市编号
#coding=utf-8
import urllib2

url1 = 'http://m.weather.com.cn/data3/city.xml'
content1 = urllib2.urlopen(url1).read()
provinces = content1.split(',')
print content1 # 输出content1可以查看全部省份代码
result = ''
url = 'http://m.weather.com.cn/data3/city%s.xml'
for p in provinces:
  p_code = p.split('|')[0]
  url2 = url % p_code
  content2 = urllib2.urlopen(url2).read() # 输出content2可以查看此省份下所有城市代码
  cities = content2.split(',')
  print content2
  for c in cities:
    c_code = c.split('|')[0]
    url3 = url % c_code
    content3 = urllib2.urlopen(url3).read()
    print content3 #content3是此城市下所有地区代码
    districts = content3.split(',')
    for d in districts: # 对于每个地区,我们把它的名字记录下来,然后再发送一次请求,得到它的最终代码:
      d_pair = d.split('|')
      d_code = d_pair[0] #
      if 5 == len(d_code):
        continue
        temp=[d_code]
        temp.insert(4,0)
        d_code ="".join(temp)
      name = d_pair[1] # 名字
      url4 = url % d_code
      content4 = urllib2.urlopen(url4).read()
      print content4
      code = content4.split('|')[1]
      line = "%s:%s\n" % (name, code)
      result += line
      print name + ':' + code
f = file('./city', 'w')
f.write(result)
f.close()
findweather
# -*- coding: utf-8 -*-
import urllib2
import json
city = {}
f =file('city','r')
src = f.readlines()
for line in src:
line = line.split('\n')[0]
name = line.split(':')[0]
code = line.split(':')[1]
city[name] = code
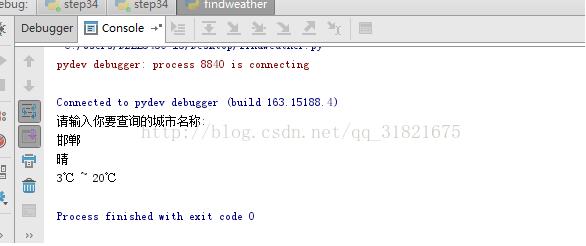
cityname = raw_input('请输入你要查询的城市名称:\n')
citycode = city.get(cityname)
print cityname
if citycode:
try:
url = ('http://www.weather.com.cn/data/cityinfo/%s.html' % citycode)
content = urllib2.urlopen(url).read()
data = json.loads(content)
result = data['weatherinfo']
str_temp = ('%s\n%s ~ %s') % (result['weather'],result['temp1'],result['temp2'])
print str_temp
except:
print '查询失败'
else:
print '没有找到该城市'
运行 findweather 即可。
以上就是本文的全部内容,希望对大家的学习有所帮助,也希望大家多多支持【听图阁-专注于Python设计】。
