Python发送邮件测试报告操作实例详解
本文实例讲述了Python发送邮件测试报告操作。分享给大家供大家参考,具体如下:
发邮件需要用到python两个模块,smtplib和email,这俩模块是python自带的,只需import即可使用。smtplib模块主要负责发送邮件,email模块主要负责构造邮件。其中MIMEText()定义邮件正文,Header()定义邮件标题。MIMEMulipart模块构造带附件
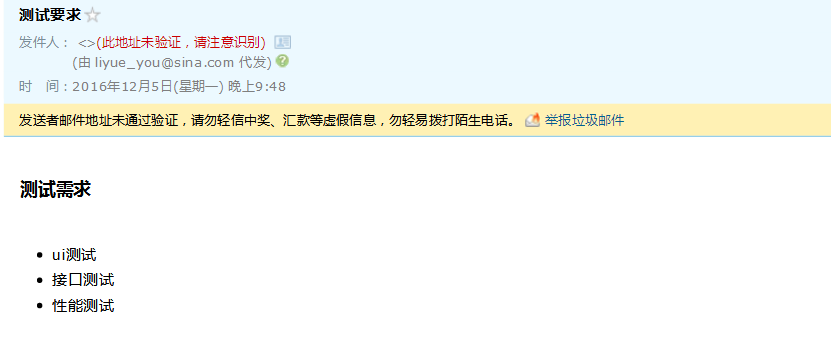
发送HTML格式的邮件:
send_email_html.py
import smtplib
from email.mime.text import MIMEText    #MIMEText()定义邮件正文
from email.header import Header      #Header()定义邮件标题
#发送邮箱服务器
smtpserver = 'smtp.sina.com'
#发送邮箱用户/密码(登录邮箱操作)
user = "username@sina.com"
password = "password"
#发送邮箱
sender = "username@sina.com"
#接收邮箱
receiver = "8888@qq.com"
#发送主题
subject = 'email by python'
#编写HTML类型的邮件正文(把HTML代码写进入)
msg = MIMEText('<html><body><a href="">百度一下</a></p></body></html>','html','utf-8')
msg['Subject'] = Header(subject,'utf-8')
#连接发送邮件(smtplib模块基本使用格式)
smtp = smtplib.SMTP()
smtp.connect(smtpserver)
smtp.login(user,password)
smtp.sendmail(sender,receiver,msg.as_string())
smtp.quit()
说明:
smtplib.SMTP():实例化SMTP()
connect(host,port):
host:指定连接的邮箱服务器。
port:指定连接服务器的端口号,默认为25.
login(user,password):user:登录邮箱的用户名。password:登录邮箱的密码。
sendmail(from_addr,to_addrs,msg,...):
from_addr:邮件发送者地址
to_addrs:邮件接收者地址。字符串列表['接收地址1','接收地址2','接收地址3',...]或'接收地址'
msg:发送消息:邮件内容。一般是msg.as_string(),as_string()是将msg(MIMEText对象或者MIMEMultipart对象)变为str。
quit():用于结束SMTP会话。

发送带附件的邮件
send_email_file.py
import smtplib
from email.mime.text import MIMEText      #MIMRText()定义邮件正文
from email.mime.multipart import MIMEMultipart #MIMEMulipart模块构造带附件
#发送邮件的服务器
smtpserver = 'smtp.sina.com'
#发送邮件用户和密码
user ="xxx@sina.com"
password = "xxx"
#发送者
sender = "xxx@sina.com"
#接收者
receiver = "1xxx@qq.com"
#邮件主题
subject = "附件的邮件"
#发送附件
sendfile = open("C:\\Users\\Administrator\\Desktop\\html5.txt","r").read()
att = MIMEText(sendfile,"base64","utf-8")
att["Content-Type"] = "application/octet-stream"
att["Content-Disposition"] = "attachment;filename = 'html5.txt'"
msgRoot = MIMEMultipart('related')
msgRoot['Subject'] = subject
msgRoot.attach(att)
smtp = smtplib.SMTP()
smtp.connect(smtpserver)
smtp.login(user,password)
smtp.sendmail(sender,receiver,msgRoot.as_string())
smtp.quit()

查找最新的测试报告
find_file.py
import os
#定义文件目录
result_dir = "E:\\自动化测试项目\\子项目_bbs\\report"
lists = os.listdir(result_dir) #获取该目录下的所有文件、文件夹,保存为列表
#对目录下的文件按创建的时间进行排序
lists.sort(key=lambda fn: os.path.getmtime(result_dir + "\\" + fn))
#lists[-1]取到的是最新生成的文件或文件夹
print(('最新的文件是:' + lists[-1]))
file = os.path.join(result_dir,lists[-1])
print(file)

整合自动化测试发送测试报告邮件
from HTMLTestRunner import HTMLTestRunner
from email.mime.text import MIMEText
from email.header import Header
import smtplib
import unittest
import time
import os
#==============定义发送邮件==========
def send_mail(file_new):
  f = open(file_new,'rb')
  mail_body = f.read()
  f.close()
  msg = MIMEText(mail_body,'html','utf-8')
  msg['Subject'] = Header("自动化测试报告",'utf-8')
  smtp = smtplib.SMTP()
  smtp.connect('smtp.sina.com')                   #邮箱服务器
  smtp.login("sender@sina.com","password")              #登录邮箱
  smtp.sendmail("sender@sina.com","receiver@qq.com",msg.as_string()) #发送者和接收者
  smtp.quit()
  print("邮件已发出!注意查收。")
#======查找测试目录,找到最新生成的测试报告文件======
def new_report(test_report):
  lists = os.listdir(test_report)                  #列出目录的下所有文件和文件夹保存到lists
  lists.sort(key=lambda fn:os.path.getmtime(test_report + "\\" + fn))#按时间排序
  file_new = os.path.join(test_report,lists[-1])           #获取最新的文件保存到file_new
  print(file_new)
  return file_new
if __name__ == "__main__":
  test_dir = "测试用例存放目录"
  test_report = "测试报告存放目录"
  discover = unittest.defaultTestLoader.discover(test_dir,
                          pattern = 'test_*.py')
  now = time.strftime("%Y-%m-%d_%H-%M-%S")
  filename = test_report + '\\' + now + 'result.html'
  fp = open(filename,'wb')
  runner = HTMLTestRunner(stream = fp,
              title = '测试报告',
              description = '用例执行情况:')
  runner.run(discover)
  fp.close()
  new_report = new_report(test_report)
  send_mail(new_report)   #发送测试报告
1.通过unittest框架的discover()找到匹配的测试用例,由HTMLTestRunner的run()方法执行测试用例并生成最新的测试报告。
2.调用new_report()函数找到测试报告目录下最新生成的测试报告,返回测试报告的路径。
3.将得到的最新测试报告的完整路径传给send_mail()函数,实现发邮件功能。

更多关于Python相关内容可查看本站专题:《Python Socket编程技巧总结》、《Python数据结构与算法教程》、《Python函数使用技巧总结》、《Python字符串操作技巧汇总》、《Python入门与进阶经典教程》及《Python文件与目录操作技巧汇总》
希望本文所述对大家Python程序设计有所帮助。
