详解Python用户登录接口的方法
Readme:
blog address:
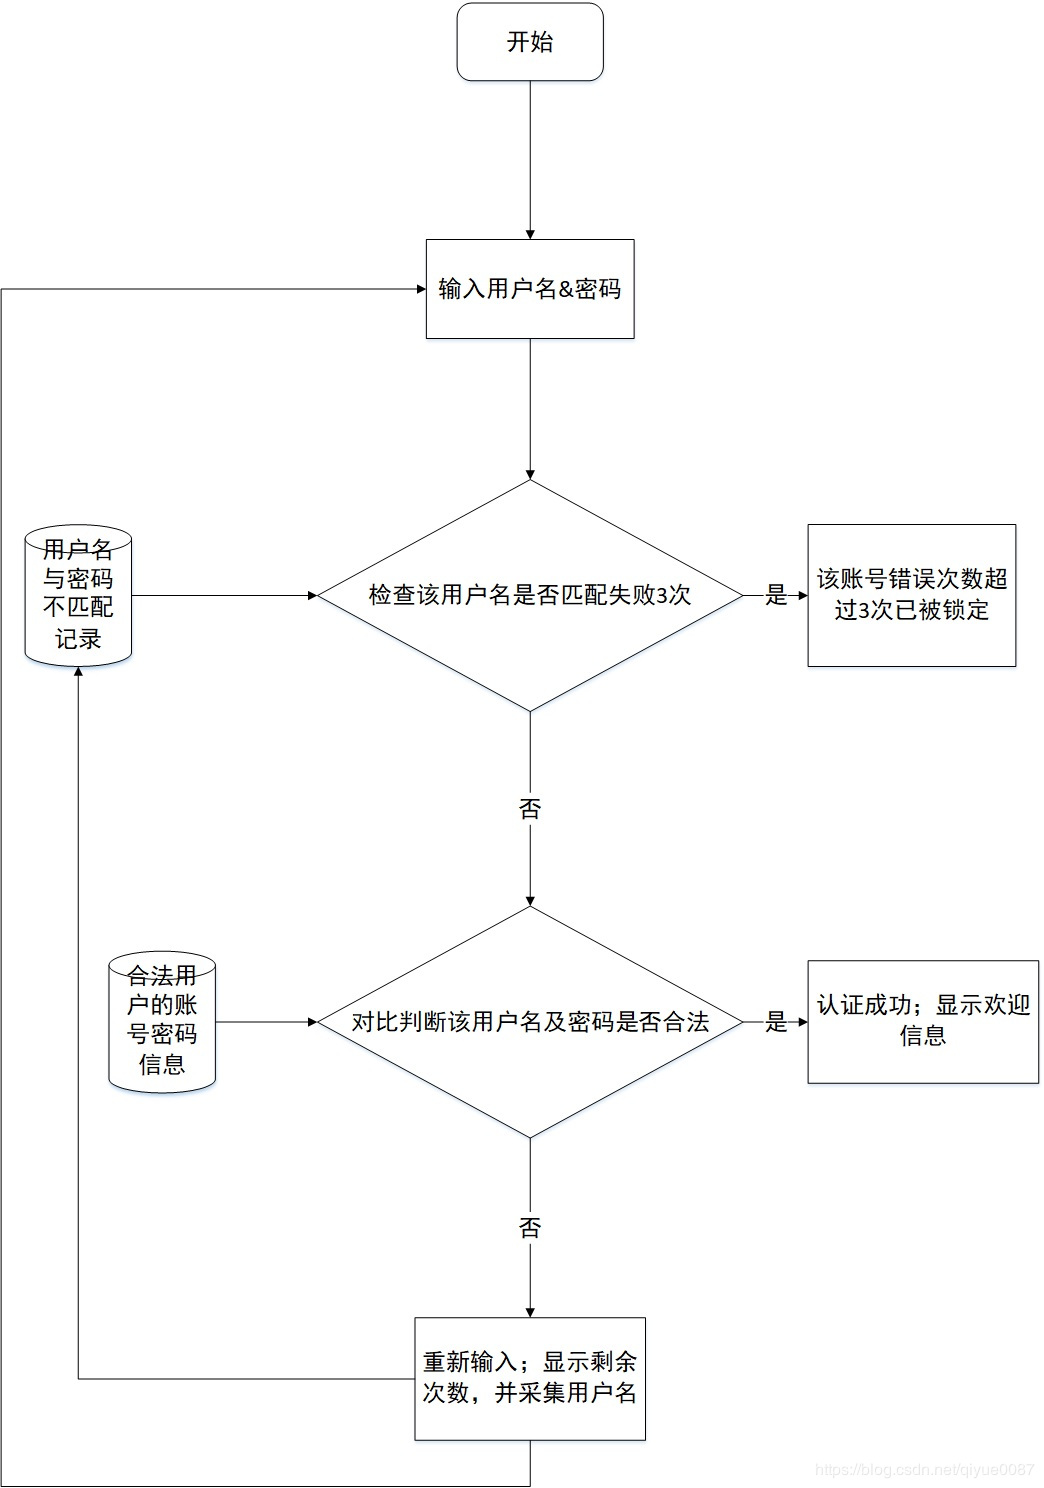
摘要:编写登录接口
输入用户名、密码
认证成功后显示欢迎信息
输错3次后锁定
关键词:循环;判断;外部数据读写;列表;字典;
展望:可以结合数据库读写。
codes:
# Author: Steven Zeng
'''
作业2:编写登录接口
输入用户名密码
认证成功后显示欢迎信息
输错3次后锁定
'''
print("welcome to here")
f1=open('username.txt')
f2=open('password.txt')
f3=open('error.txt')#建立一个Demo记录输错3次密码的用户,并对其锁定
username_true=f1.readlines()#readlines读取方式返回的是逐行一个元素的列表
password_true=f2.readlines()
un_error=f3.readlines()
f1.close()
f2.close()
f3.close()
UK={}
#建立一个字典形式为用户名对密码
for i in range(len(username_true)):
 UK[str(username_true[i])]=str(password_true[i])#注:字典的键必须是不可变更型数据(常用整数和字符串)
# 而键值可以是数字也可以是字符串
#print(un_error)
#print(un_error.count(777+'\n')
#print(UK)
count=0
while count<3:
 username = input("Please, input your username:")
 password = input("Please, input your keywords")
 if un_error.count(str(username+'\n'))>=3:
  print("Out of trying, You are Locking!")
  break
 elif str(username+'\n') in UK and str(password+'\n')==UK.get(str(username+'\n')):
  print("welcome to you, honorable customer!")
  break
 else:
  print('''Invalid customer, please try again!
  And you have {count_left1} times left!'''.format(count_left1=2-count))
  f3=open('error.txt','a')#建立一个Demo记录输错3次密码的用户,并对其锁定
  f3.write(username+'\n')
  f3.close()
 count += 1
以上所述是小编给大家介绍的Python用户登录接口的方法详解整合,希望对大家有所帮助,如果大家有任何疑问请给我留言,小编会及时回复大家的。在此也非常感谢大家对【听图阁-专注于Python设计】网站的支持!