Django框架实现的分页demo示例
本文实例讲述了Django框架实现的分页。分享给大家供大家参考,具体如下:
首先初始化model,建表
class Book(models.Model):
  name = models.CharField(max_length=20)
  def __str__(self):
    return self.name
  class Meta:
    db_table = 'books'
然后用pycharm的数据库模块可视化插入
分页思路
url传递参数http://127.0.0.1:8000/books/?page=5比如这样传递的参数就是5,就显示第五页,
1.get到所有图书对象
2.计算好每一页应该有几个数据
3.根据不同的page值传递
def books(request):
  #取从url传递的参数
  page_num = request.GET.get('page')
  page_num = int(page_num)
  start = (page_num-1)*5
  end = page_num*5
  #总页码数是?
  per_page = 5
  total = models.Book.objects.all().count()
  total,more =divmod(total,per_page)
  if more:
    total+=1
  all_books = models.Book.objects.all()[start:end]
  #自己拼接分页的html代码
  html_str_list = []
  for i in range(1,total):
    tmp = '<li><a href="/books/?page={}" rel="external nofollow" rel="external nofollow" rel="external nofollow" rel="external nofollow" >{}</li>'.format(i,i)
    html_str_list.append(tmp)
  page_html = "".join(html_str_list)
  return render(request,'books.html',{'books':all_books,'total_page':total,'page_html':page_html})
拿到数据总量的值,每一页的数量为5,如果有余数则total+1也就是增加一个页面.
建立一个列表,去拼接a标签,最后传递给前端
前端
前端的样式用到了boottrap,可以直接看文档.
<!DOCTYPE html>
<html lang="en">
<head>
  <meta charset="UTF-8">
  <title>书记列表</title>
  <link rel="stylesheet" href="/static/bootstrap/css/bootstrap.css" rel="external nofollow" >
</head>
<body>
<div class="container">
  <table class="table table-bordered">
    <thead>
    <tr>
      <th>序号</th>
      <th>id</th>
      <th>书名</th>
    </tr>
    </thead>
    <tbody>
    {% for book in books %}
      <tr>
        <td>{{ forloop.counter }}</td>
        <td>{{ book.id }}</td>
        <td>{{ book.name }}</td>
      </tr>
    {% endfor %}
    </tbody>
  </table>
<nav aria-label="Page navigation">
 <ul class="pagination">
  <li>
   <a href="#" rel="external nofollow" rel="external nofollow" aria-label="Previous">
    <span aria-hidden="true">«</span>
   </a>
  </li>
   {{ page_html|safe }}
  <li>
   <a href="#" rel="external nofollow" rel="external nofollow" aria-label="Next">
    <span aria-hidden="true">»</span>
   </a>
  </li>
 </ul>
</nav>
</div>
</body>
</html>
{{ page_html|safe }}
传递过来的page_html要用safe过滤器,不然无法转移成html.
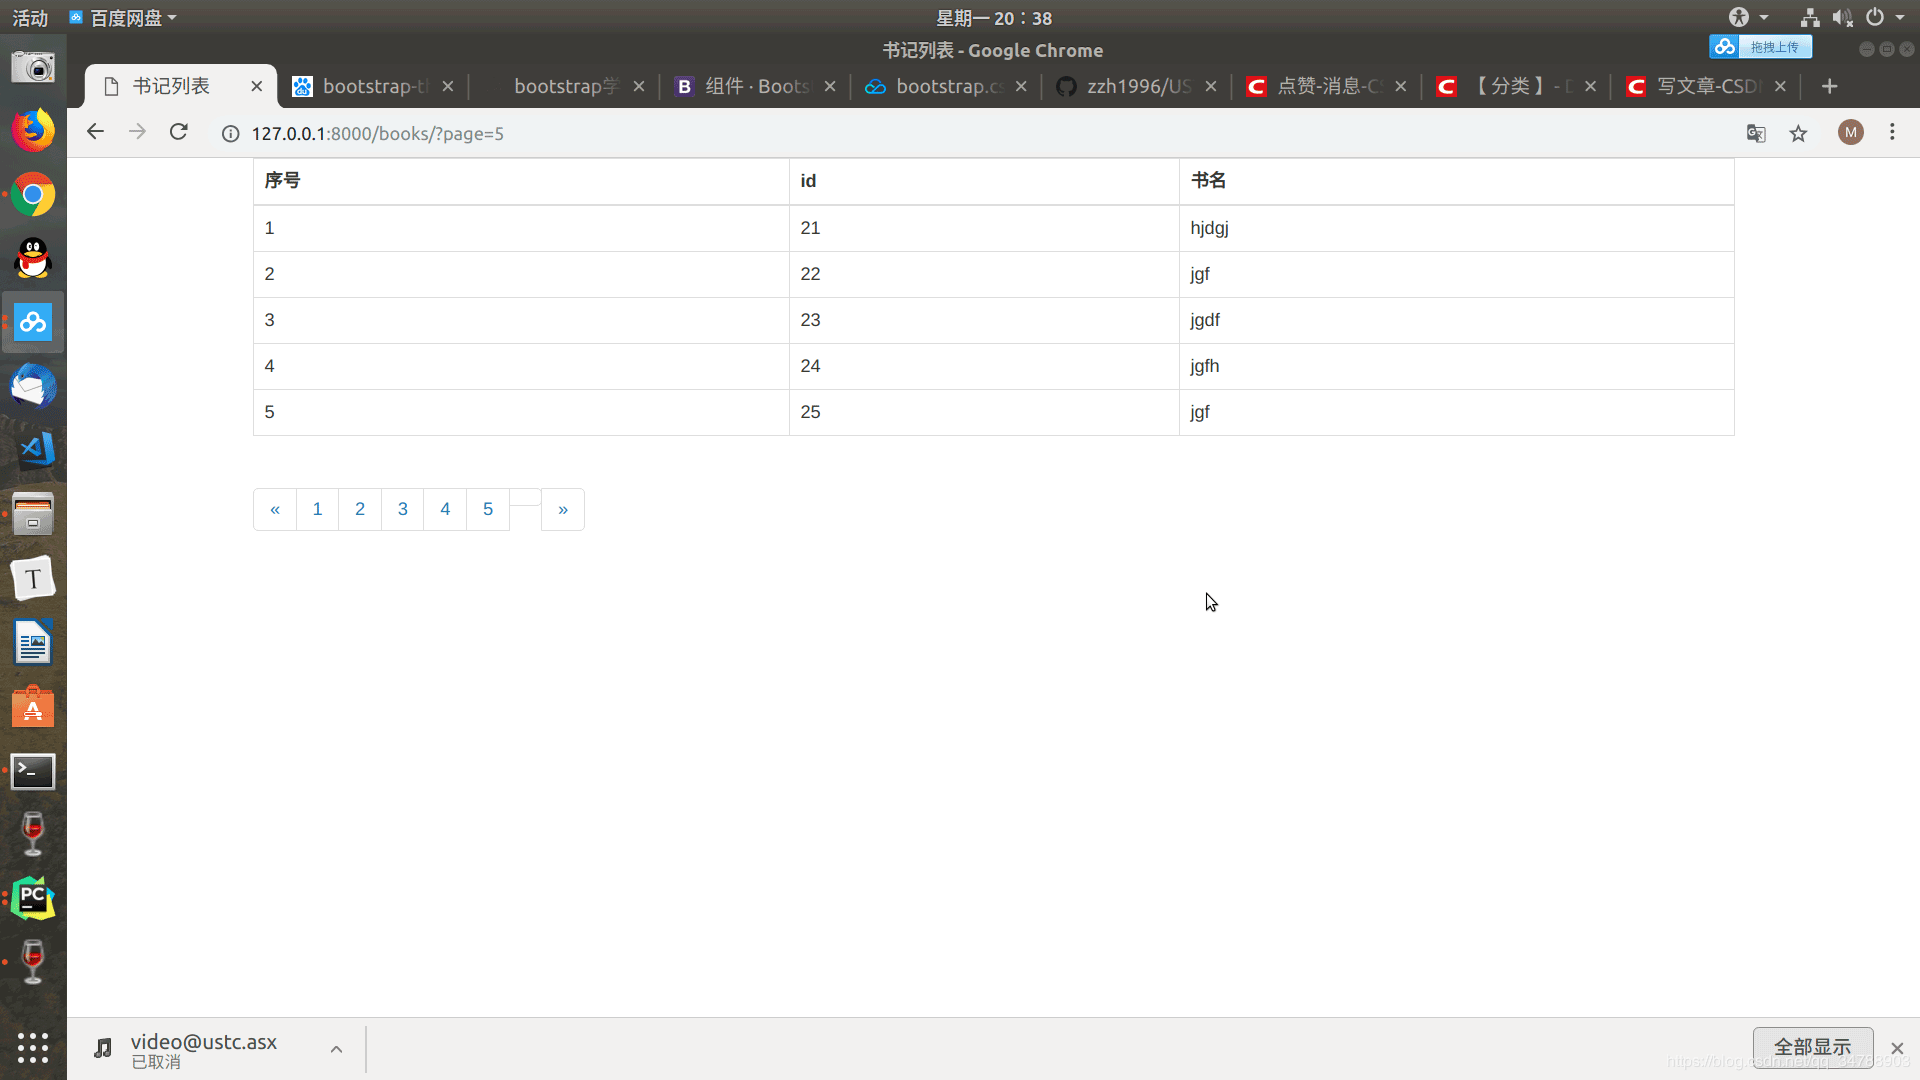
最终效果
分页优化
设置一个首页一个尾页,以及显示局部的页面
def books(request):
  # 取从url传递的参数
  page_num = request.GET.get('page')
  page_num = int(page_num)
  start = (page_num - 1) * 5
  end = page_num * 5
  # 总页码数是?
  per_page = 5
  # 页面上总共展示多少页面
  max_page = 11
  half_max_page = max_page // 2
  # 页面上展示的页面从哪开始
  page_start = page_num - half_max_page
  if page_start <= 1:
    page_start = 1
  total = models.Book.objects.all().count()
  # 页面到哪结束
  page_end = page_num+half_max_page
  if page_end > total:
    page_end = total
    page_start = total - max_page
  total, more = divmod(total, per_page)
  if more:
    total += 1
  all_books = models.Book.objects.all()[start:end]
  # 自己拼接分页的html代码
  html_str_list = []
  html_str_list.append('<li><a href="/books/?page={}" rel="external nofollow" rel="external nofollow" rel="external nofollow" rel="external nofollow" >首页</li>'.format(1,1))
  for i in range(page_start, page_end+1):
    tmp = '<li><a href="/books/?page={}" rel="external nofollow" rel="external nofollow" rel="external nofollow" rel="external nofollow" >{}</li>'.format(i, i)
    html_str_list.append(tmp)
  html_str_list.append('<li><a href="/books/?page={}" rel="external nofollow" rel="external nofollow" rel="external nofollow" rel="external nofollow" >最后一页</li>'.format(total))
  page_html = "".join(html_str_list)
  return render(request, 'books.html', {'books': all_books, 'total_page': total, 'page_html': page_html})
希望本文所述对大家基于Django框架的Python程序设计有所帮助。