对PyQt5基本窗口控件 QMainWindow的使用详解
QMainWindow基本介绍
QMainWindow主窗口为用户提供了一个应用程序框架,它有自己的布局,可以在布局中添加控件。
窗口类型介绍
PyQt5中,主要使用以下三个类来创建窗口,可以直接使用,也可以继承后再使用
QMainWindow
QWidget
QDialog
QMainWindow
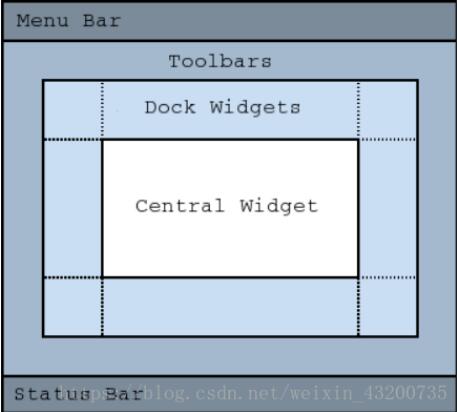
QMainWindow可以包含菜单栏,工具栏,状态栏,标题栏等,是GUI程序的主窗口。
如果我们需要创建主窗口程序,就使用该类。
QDialog
QDialog是对话框窗口的基类,对话框一般用来执行短期任务,或者与用户进行互动,它可以是模态的也可以是非模态的。QDialog没有菜单栏,工具栏,状态栏等。
如果我们需要的是对话框,就选择该类。
QWidget
该类作为QMainWindow和QWidget的父类,并未细化到主窗口或者对话框,作为通用窗口类,如果不确定具体使用哪种窗口类,就可以使用该类。
创建主窗口
如果一个窗口包含一个或者多个窗口,这个窗口就是父窗口,被包含的窗口就是子窗口。没有父窗口的窗口就是顶层窗口,QMainWindow就是顶层窗口,它可以包含很多界面元素。
在OyQt中,在主窗口中会有一个控件(Widget)占位符来占着中心窗口,可以使用setCentralWidget()来设置中心窗口。
重要方法
| 方法 | 描述 |
|---|---|
| addToolBar() | 添加工具栏 |
| centralWidget() | 返回窗口中心的控件,未设置返回NULL |
| menuBar() | 返回主窗口的菜单栏 |
| setCentralWidget() | 设置窗口中心的控件 |
| setStatusBar() | 设置状态栏 |
| statusBar() | 获取状态栏对象 |
Note: Creating a main window without a central widget is not supported. You must have a central widget even if it is just a placeholder.
QMainWindow不能设置布局,因为它有自己的布局,不过中心窗口是可以使用布局的。
创建一个主窗口
# _*_ coding:utf-8 _*_
import sys
from PyQt5.QtWidgets import (QApplication, QMainWindow, QPushButton)
from PyQt5.QtGui import QIcon
class MainWindow(QMainWindow):
def __init__(self, parent=None):
super(MainWindow, self).__init__(parent)
self.init_ui()
def init_ui(self):
#设置窗口属性
self.setGeometry(200, 200, 400, 200)
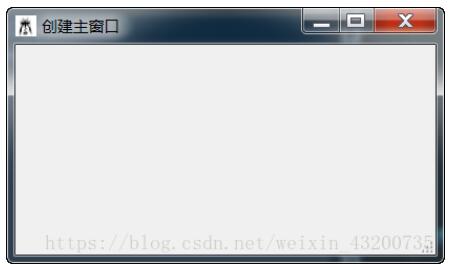
self.setWindowTitle('创建主窗口')
self.setWindowIcon(QIcon(r"E:\\1.jpg"))
#设置状态栏
self.status = self.statusBar()
self.status.showMessage('我是状态栏', 5000)
if __name__ == "__main__":
app = QApplication(sys.argv[1:])
window = MainWindow()
window.show()
sys.exit(app.exec_())
主窗口居中显示
# _*_ coding:utf-8 _*_
import sys
from PyQt5.QtWidgets import (QApplication, QMainWindow, QDesktopWidget)
from PyQt5.QtGui import QIcon

class MainWindow(QMainWindow):
 def __init__(self, parent=None):
  super(MainWindow, self).__init__(parent)
  self.init_ui()

 def init_ui(self):
  #设置窗口属性
  self.resize(400, 200)
  self.setWindowTitle('主窗口居中显示')
  self.setWindowIcon(QIcon(r"E:\\1.jpg"))
  #设置状态栏
  self.status = self.statusBar()
  self.status.showMessage('我是状态栏', 5000)
  #居中显示处理
  self.move_center()

 def move_center(self):
  screen = QDesktopWidget().screenGeometry()
  form = self.geometry()
  x_move_step = (screen.width() - form.width()) / 2
  y_move_step = (screen.height() - form.height()) / 2
  self.move(x_move_step, y_move_step)

if __name__ == "__main__":
 app = QApplication(sys.argv[1:])

 window = MainWindow()
 window.show()

 sys.exit(app.exec_())

screen = QDesktopWidget().screenGeometry()
获取当前屏幕的大小
self.geometry()
获取窗口大小
关闭主窗口
# _*_ coding:utf-8 _*_
import sys
from PyQt5.QtWidgets import (QApplication, QWidget, QVBoxLayout,
        QPushButton, QMainWindow)

class MainWindow(QMainWindow):
 def __init__(self):
  super(MainWindow, self).__init__()
  self.init_ui()

 def init_ui(self):
  self.setWindowTitle('关闭主窗口')

  layout = QVBoxLayout()
  self.close_btn = QPushButton('关闭', self)
  layout.addWidget(self.close_btn)

  main_frame = QWidget()
  self.setCentralWidget(main_frame)
  main_frame.setLayout(layout)

  self.close_btn.clicked.connect(self.on_button_click)

 def on_button_click(self):
  #将信息显示在状态栏中
  sender = self.sender()
  msg = sender.text() + " 被按下了"
  status = self.statusBar()
  status.showMessage(msg, 5000)
  #程序退出
  app = QApplication.instance()
  app.quit()

if __name__ == "__main__":
 app = QApplication(sys.argv[1:])

 window = MainWindow()
 window.show()

 sys.exit(app.exec_())

self.close_btn.clicked.connect(self.on_button_click)
PyQt中控件之间通信使用信号(Signal)和槽(slot)机制。
定义的方式为 控件.消息.connect(槽)
上例中,就是将button的clicked信号跟槽on_button_click进行了绑定。
以上这篇对PyQt5基本窗口控件 QMainWindow的使用详解就是小编分享给大家的全部内容了,希望能给大家一个参考,也希望大家多多支持【听图阁-专注于Python设计】。
