Python学习笔记之Django创建第一个数据库模型的方法
Django里面集成了SQLite的数据库,对于初期研究来说,可以用这个学习。
第一步,创建数据库就涉及到建表等一系列的工作,在此之前,要先在cmd执行一个命令:
python manage.py migrate
这个命令就看成一个打包安装的命令,它会根据mysite/settings.py的配置安装一系列必要的数据库表
第二步,我们要建立一个Model层,修改demo/model.py:
from django.db import models
classQuestion(models.Model):
question_text = models.CharField(max_length=200)
pub_date = models.DateTimeField('date published')
classChoice(models.Model):
question = models.ForeignKey(Question, on_delete=models.CASCADE)
choice_text = models.CharField(max_length=200)
votes = models.IntegerField(default=0)
这个Model的内容包括创建表(对象)、确定变量(字段)的类型,以及外键方面的信息
第三步,要激活Model,那么现在helloworld/setting.py中修改:
INSTALLED_APPS =[
'demo.apps.DemoConfig',
'django.contrib.admin',
'django.contrib.auth',
'django.contrib.contenttypes',
'django.contrib.sessions',
'django.contrib.messages',
'django.contrib.staticfiles',
]
主要是加了第一行的内容,这个在demo/apps下有的。目的是让Django知道有demo这个app。
然后就在cmd下面运行:
python manage.py makemigrations demo
可以看到在demo/migrations/0001_initial.py下面生成了很多代码
继续run这段代码,就完成了建表工作:
python manage.py sqlmigrate demo 0001
再跑一下migrate命令,把这些model创建到数据库表中
python manage.py migrate
第四步,也是比较好玩的了,就是要进入到python django的shell中,执行这个命令:
python manage.py shell

在这个里面,就可以通过命令行操作数据库了
先引入刚才创建好的model:
from demo.models importQuestion,Choice
这个命令,打印出Question所有的对象:
Question.objects.all()
然后创建一个Question的对象(或数据):
from django.utils import timezone
q =Question(question_text="What's new?", pub_date=timezone.now())
q.save()
q.id
q.question_text
q.pub_date
q.question_text = "What's up?"
q.save()
Question.objects.all()
第五步,然后polls/models.py中添加以下代码:
from django.db import models
from django.utils.encoding import python_2_unicode_compatible
@python_2_unicode_compatible# only if you need to support Python 2
classQuestion(models.Model):
# ...
def __str__(self):
return self.question_text
@python_2_unicode_compatible# only if you need to support Python 2
classChoice(models.Model):
# ...
def __str__(self):
return self.choice_text
import datetime
from django.db import models
from django.utils import timezone
classQuestion(models.Model):
# ...
def was_published_recently(self):
return self.pub_date >= timezone.now()- datetime.timedelta(days=1)
在这里__str__()是一个非常重要的方法,大概可以看成java里pojo对象的一个toString()方法
接下来,就可以在数据库中进行很多操作,在shell中输入以下的代码,就可以执行对数据库的增删查改:
from polls.models importQuestion,Choice
Question.objects.all()
Question.objects.filter(id=1)
Question.objects.filter(question_text__startswith='What')
from django.utils import timezone
current_year = timezone.now().year
Question.objects.get(pub_date__year=current_year)
Question.objects.get(id=2)
Question.objects.get(pk=1)
q =Question.objects.get(pk=1)
q.was_published_recently()
q =Question.objects.get(pk=1)
q.choice_set.all()
q.choice_set.create(choice_text='Not much', votes=0)
q.choice_set.create(choice_text='The sky', votes=0)
c = q.choice_set.create(choice_text='Just hacking again', votes=0)
c.question
q.choice_set.all()
q.choice_set.count()
Choice.objects.filter(question__pub_date__year=current_year)
c = q.choice_set.filter(choice_text__startswith='Just hacking')
c.delete()
操作django Admin
Django的管理端可以管理站点、管理账户权限等等。
在cmd运行以下的脚本创建账户:
python manage.py createsuperuser
Username: admin
Email address: admin@example.com
Password:**********
Password(again):*********
Superuser created successfully.
启动server:
python manage.py runserver 8081
访问链接地址:
http://127.0.0.1:8081/admin/
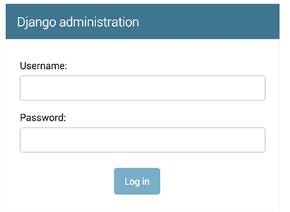
登录界面:
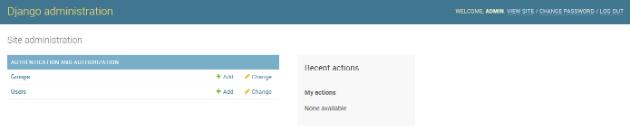
管理界面:
在demo/admin.py中添加代码注册对象:
from django.contrib import admin
from.models importQuestion
admin.site.register(Question)
刷新后即增加这个对象:
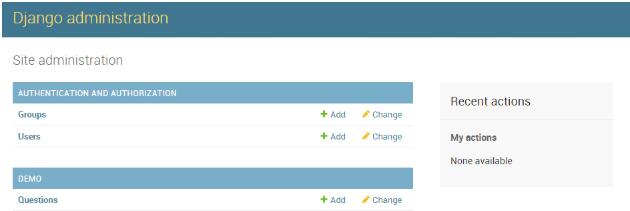
点击Questions进去:
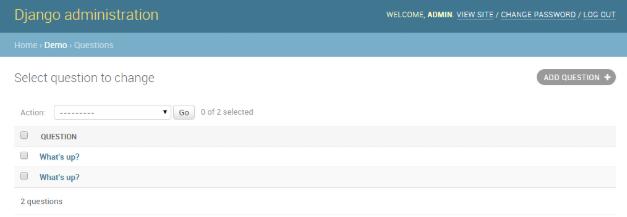
这样,就可以在图形化的界面中执行增删查改了。
以上这篇Python学习笔记之Django创建第一个数据库模型的方法就是小编分享给大家的全部内容了,希望能给大家一个参考,也希望大家多多支持【听图阁-专注于Python设计】。