python使用PIL和matplotlib获取图片像素点并合并解析
python 版本 3.x
首先安装 PIL
由于PIL仅支持到Python 2.7,加上年久失修,于是一群志愿者在PIL的基础上创建了兼容的版本,名字叫Pillow,支持最新Python 3.x,又加入了许多新特性,因此,我们可以直接安装使用Pillow。
所以 安装:
pip install pillow
获取像素点
import numpy as np
from PIL import Image
img = Image.open("./b.png").convert('RGBA')
a_img = np.asarray(img)
获取的图片像素为 一个二维数组,相当于是二维左边系, x ,y 然后里面存了一个元组 值分别为 r g b a
分别计算改变了像素值之后,就需要将数据写入到图片了,这个时候就需要 matplotlib
import matplotlib.pyplot as plt

plt.figure("beauty") # 开启图层,名称为 beauty
plt.imshow(a_img) # 二维数组的数据
plt.axis('off')
#plt.show()
plt.savefig("./result.png")
下面给出一个完整的 demo
需要将两张图片合并计算,并输出结果:

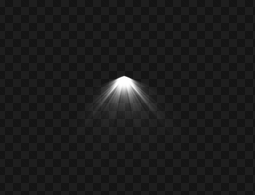
将上面两个图片合并
from PIL import Image
import numpy as np
import matplotlib.pyplot as plt
def modeSuperposition(basePixel,mixPixel,alpha):
 basePixel = int(basePixel)
 mixPixel = int(mixPixel);
 res=0
 if basePixel <= 128 :
  res = int(mixPixel) * int(basePixel) / 128;
 else:
  res = 255 - (255 - mixPixel)*(255 - basePixel) / 128;
 a = alpha / 255;
 if a > 1:
  a = 1
 res = (1-a)*basePixel + a*res
 t = int(res)&-256
 if t == 0:
  return int(res)
 if res > 255:
  return 255
 return 0
def mergePoint(x,y):
 p1 = img1[x][y]
 p2 = img2[x][y]
 p1[1] = modeSuperposition(p1[0],p2[0],p2[3])
 p1[2] = modeSuperposition(p1[1],p2[1],p2[3])
 p1[3] = modeSuperposition(p1[2],p2[2],p2[3])
imgA = Image.open('./b.png')
img1=np.array(imgA.convert('RGBA')) #打开图像并转化为数字矩
img2=np.array(Image.open("./light.png").convert('RGBA'))
i = len(img1);
j = len(img1[0]);

for k in range(0,len(img2)):
 for n in range(0,len(img2[0])):
  if k < i and n < j:
   mergePoint(k,n)
#img = Image.new("RGBA",imgA.size)###创建一个5*5的图片
plt.figure("beauty") # 开启图层,名称为 beauty
plt.imshow(img1) # 二维数组的数据
plt.axis('off')
#plt.show()
plt.savefig("./result.png")
结果如下:

以上就是本文的全部内容,希望对大家的学习有所帮助,也希望大家多多支持【听图阁-专注于Python设计】。