python实现发送form-data数据的方法详解
本文实例讲述了python实现发送form-data数据的方法。分享给大家供大家参考,具体如下:
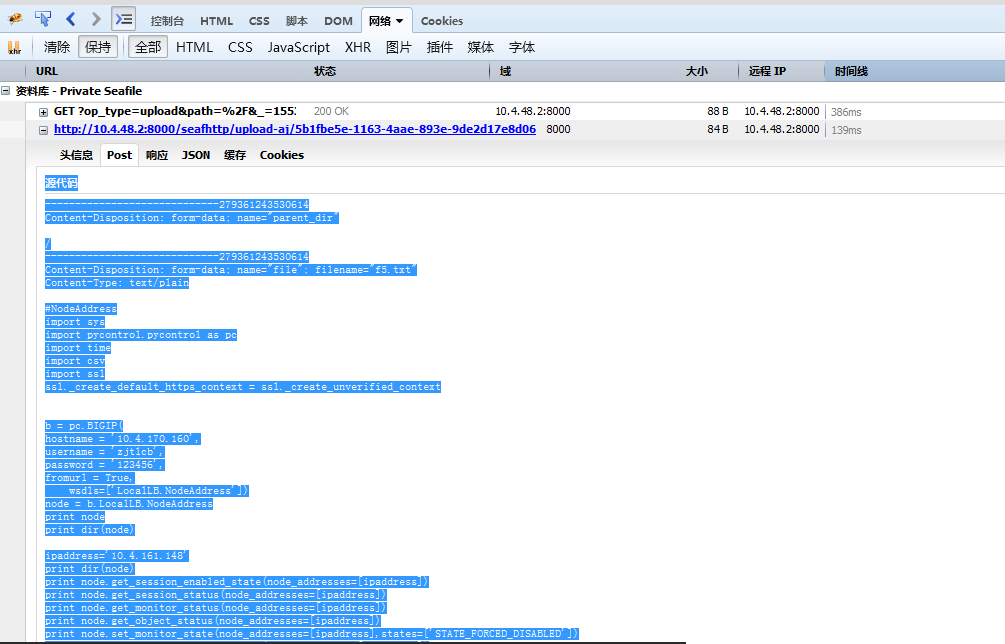
源代码
-----------------------------279361243530614
Content-Disposition: form-data; name="parent_dir"/
-----------------------------279361243530614
Content-Disposition: form-data; name="file"; filename="f5.txt"
Content-Type: text/plain
#NodeAddress
import sys
import pycontrol.pycontrol as pc
import time
import csv
import ssl
ssl._create_default_https_context = ssl._create_unverified_context
b = pc.BIGIP(
hostname = '10.4.170.160',
username = 'zjtlcb',
password = 'xxx',
fromurl = True,
  wsdls=['LocalLB.NodeAddress'])
node = b.LocalLB.NodeAddress
print node
print dir(node)
ipaddress='10.4.161.148'
print dir(node)
print node.get_session_enabled_state(node_addresses=[ipaddress])
print node.get_session_status(node_addresses=[ipaddress])
print node.get_monitor_status(node_addresses=[ipaddress])
print node.get_object_status(node_addresses=[ipaddress])
print node.set_monitor_state(node_addresses=[ipaddress],states=['STATE_FORCED_DISABLED'])
print node.get_session_enabled_state(node_addresses=[ipaddress])
print node.get_session_status(node_addresses=[ipaddress])
print node.get_monitor_status(node_addresses=[ipaddress])
print node.get_object_status(node_addresses=[ipaddress])
print node.set_monitor_state(node_addresses=[ipaddress],states=['STATE_ENABLED'])
print node.get_session_enabled_state(node_addresses=[ipaddress])
print node.get_session_status(node_addresses=[ipaddress])
print node.get_monitor_status(node_addresses=[ipaddress])
-----------------------------279361243530614--
# !/usr/bin/env python
# -*- coding: utf-8 -*-
import urllib2
import urllib
import cookielib
import json
import httplib
import re
import requests
import StringIO
import time
import sys
import json
import re
import random
from urllib import quote
from requests_toolbelt import MultipartEncoder
import time
s = requests.session()
username='015208@zjtlcb.com'
password='newja01'
myurl='http://10.4.48.2:8000/accounts/login?next=/'
headers = {
  'User-Agent': 'Mozilla/5.0 (Windows NT 6.1; Win64; x64; rv:54.0) Gecko/20100101 Firefox/54.0'
   }
response = s.get(myurl, headers=headers,timeout=10)
a= response.content
#<form action="" method="post" class="con"><input type='hidden' name='csrfmiddlewaretoken' value='ZWnUDf5XVX0kagjIoJLKyU8UdO8KBGFn' />
#p=re.compile('.*?<token>(.*?)</token>*')
p=re.compile('.*<form.*value=\'(.*?)\'.*\s+/>',flags=re.S)
m=p.match(a)
print m
token= m.group(1)
print token
myurl='http://10.4.48.2:8000/accounts/login/?next=/'
headers = {
  'User-Agent': 'Mozilla/5.0 (Windows NT 6.1; Win64; x64; rv:54.0) Gecko/20100101 Firefox/54.0'
   }
data={'csrfmiddlewaretoken':token,'login':username,'password':password,'next':'/'}
response = s.post(myurl, data=data, headers=headers,timeout=10)
print response.content
u1='http://10.4.48.2:8000/api2/repos/?type=mine&_=1553493865054'
a= s.get(u1).content
print a
print type(a)
b=json.loads(a)
print b
print type(b)
for i in range(len(b)):
  print str(b[i]).decode('unicode-escape')
  if b[i]['name'] == 'perl':
    uploadid= b[i]['id']
print uploadid
ctime=time.time()
ctime=int(ctime)
u2='http://10.4.48.2:8000/ajax/repo/%s/file_op_url/?op_type=upload&path=%s&_=%s' %(uploadid,'%2F',ctime)
print u2
headers = {
  'User-Agent': 'Mozilla/5.0 (Windows NT 6.1; Win64; x64; rv:54.0) Gecko/20100101 Firefox/54.0',
  'X-Requested-With':'XMLHttpRequest'
   }
response=s.get(u2,headers=headers)
b= response.content
print type(b)
print b
c=json.loads(b)
d= c['url']
u3=d
headers = {
  'User-Agent': 'Mozilla/5.0 (Windows NT 6.1; Win64; x64; rv:54.0) Gecko/20100101 Firefox/54.0',
  'X-Requested-With':'XMLHttpRequest'
   }
m=MultipartEncoder(
  fields={
    "parent_dir":'/',
    "name":'file',
    "filename":'abc.txt',
    'file':('abc.txt',open('abc.txt','rb'),'text/plain')
  }
)
headers['Content-Type']=m.content_type
response=s.post(u3,headers=headers,data=m,timeout=20)
print response.content
更多关于Python相关内容可查看本站专题:《Python Socket编程技巧总结》、《Python数据结构与算法教程》、《Python函数使用技巧总结》、《Python字符串操作技巧汇总》、《Python入门与进阶经典教程》及《Python文件与目录操作技巧汇总》
希望本文所述对大家Python程序设计有所帮助。