Python迷宫生成和迷宫破解算法实例
迷宫生成
1.随机PRIM
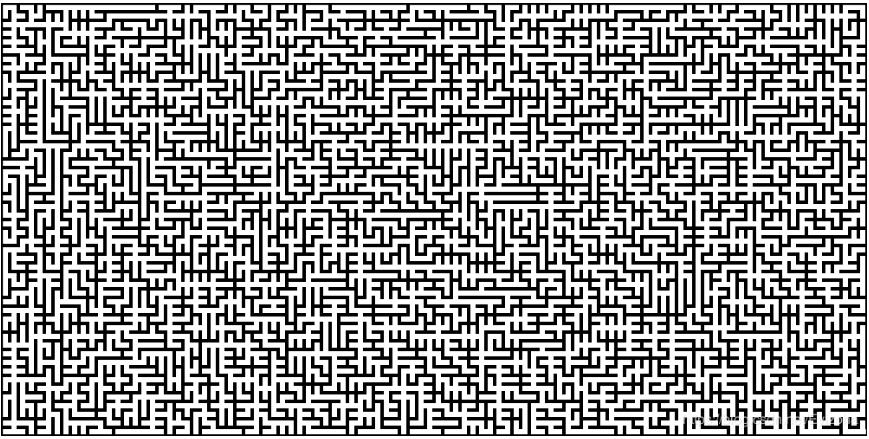
思路:先让迷宫中全都是墙,不断从列表(最初只含有一个启始单元格)中选取一个单元格标记为通路,将其周围(上下左右)未访问过的单元格放入列表并标记为已访问,再随机选取该单元格与周围通路单元格(若有的话)之间的一面墙打通。重复以上步骤直到列表为空,迷宫生成完毕。这种方式生成的迷宫难度高,岔口多。
效果:
代码:
import random
import numpy as np
from matplotlib import pyplot as plt


def build_twist(num_rows, num_cols): # 扭曲迷宫
	# (行坐标,列坐标,四面墙的有无&访问标记)
 m = np.zeros((num_rows, num_cols, 5), dtype=np.uint8)
 r, c = 0, 0
 trace = [(r, c)]
 while trace:
  r, c = random.choice(trace)
  m[r, c, 4] = 1	# 标记为通路
  trace.remove((r, c))
  check = []
  if c > 0:
   if m[r, c - 1, 4] == 1:
    check.append('L')
   elif m[r, c - 1, 4] == 0:
    trace.append((r, c - 1))
    m[r, c - 1, 4] = 2	# 标记为已访问
  if r > 0:
   if m[r - 1, c, 4] == 1:
    check.append('U')
   elif m[r - 1, c, 4] == 0:
    trace.append((r - 1, c))
    m[r - 1, c, 4] = 2
  if c < num_cols - 1:
   if m[r, c + 1, 4] == 1:
    check.append('R')
   elif m[r, c + 1, 4] == 0:
    trace.append((r, c + 1))
    m[r, c + 1, 4] = 2
  if r < num_rows - 1:
   if m[r + 1, c, 4] == 1:
    check.append('D')
   elif m[r + 1, c, 4] == 0:
    trace.append((r + 1, c))
    m[r + 1, c, 4] = 2
  if len(check):
   direction = random.choice(check)
   if direction == 'L':	# 打通一面墙
    m[r, c, 0] = 1
    c = c - 1
    m[r, c, 2] = 1
   if direction == 'U':
    m[r, c, 1] = 1
    r = r - 1
    m[r, c, 3] = 1
   if direction == 'R':
    m[r, c, 2] = 1
    c = c + 1
    m[r, c, 0] = 1
   if direction == 'D':
    m[r, c, 3] = 1
    r = r + 1
    m[r, c, 1] = 1
 m[0, 0, 0] = 1
 m[num_rows - 1, num_cols - 1, 2] = 1
 return m
2.深度优先
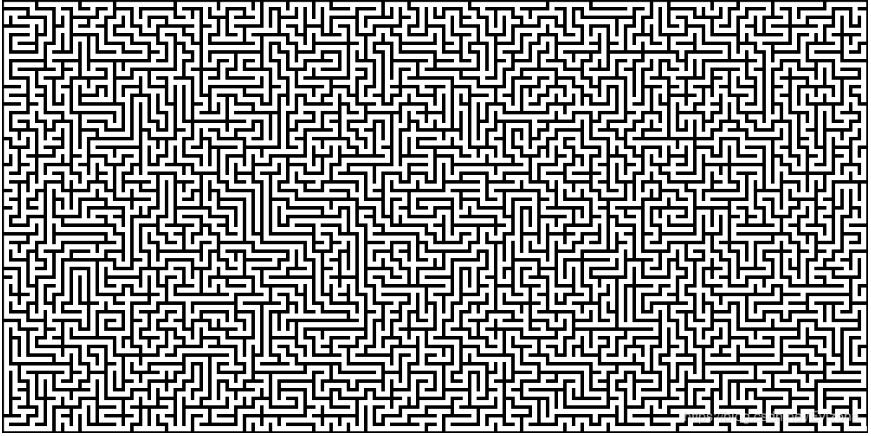
思路:从起点开始随机游走并在前进方向两侧建立墙壁,标记走过的单元格,当无路可走(周围无未访问过的单元格)时重复返回上一个格子直到有新的未访问单元格可走。最终所有单元格都被访问过后迷宫生成完毕。这种方式生成的迷宫较为简单,由一条明显但是曲折的主路径和不多的分支路径组成。
效果:
代码:
def build_tortuous(num_rows, num_cols): # 曲折迷宫
 m = np.zeros((num_rows, num_cols, 5), dtype=np.uint8)
 r = 0
 c = 0
 trace = [(r, c)]
 while trace:
  m[r, c, 4] = 1	# 标记为已访问
  check = []
  if c > 0 and m[r, c - 1, 4] == 0:
   check.append('L')
  if r > 0 and m[r - 1, c, 4] == 0:
   check.append('U')
  if c < num_cols - 1 and m[r, c + 1, 4] == 0:
   check.append('R')
  if r < num_rows - 1 and m[r + 1, c, 4] == 0:
   check.append('D')
  if len(check):
   trace.append([r, c])
   direction = random.choice(check)
   if direction == 'L':
    m[r, c, 0] = 1
    c = c - 1
    m[r, c, 2] = 1
   if direction == 'U':
    m[r, c, 1] = 1
    r = r - 1
    m[r, c, 3] = 1
   if direction == 'R':
    m[r, c, 2] = 1
    c = c + 1
    m[r, c, 0] = 1
   if direction == 'D':
    m[r, c, 3] = 1
    r = r + 1
    m[r, c, 1] = 1
  else:
   r, c = trace.pop()
 m[0, 0, 0] = 1
 m[num_rows - 1, num_cols - 1, 2] = 1
 return m
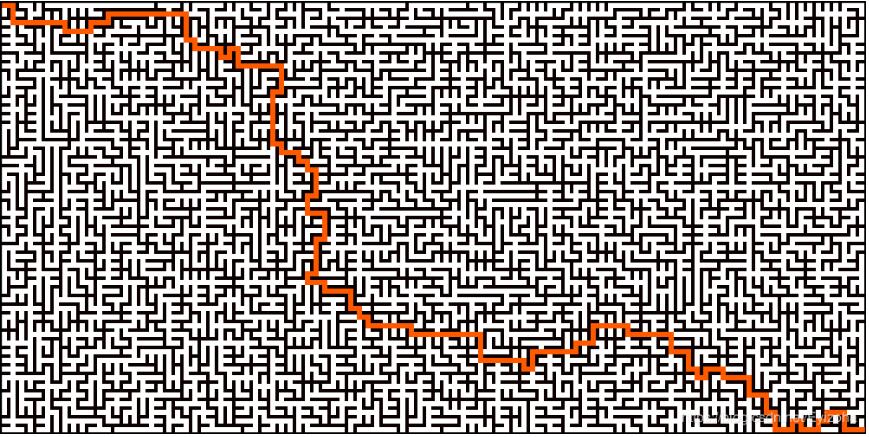
迷宫破解
效果:
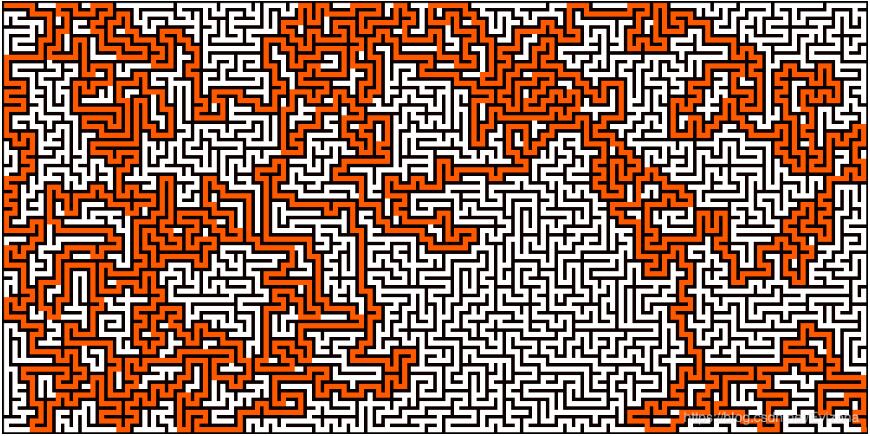
1.填坑法
思路:从起点开始,不断随机选择没墙的方向前进,当处于一个坑(除了来时的方向外三面都是墙)中时,退一步并建造一堵墙将坑封上。不断重复以上步骤,最终就能抵达终点。
优缺点:可以处理含有环路的迷宫,但是处理时间较长还需要更多的储存空间。
代码:
def solve_fill(num_rows, num_cols, m): # 填坑法
 map_arr = m.copy()	# 拷贝一份迷宫来填坑
 map_arr[0, 0, 0] = 0
 map_arr[num_rows-1, num_cols-1, 2] = 0
 move_list = []
 xy_list = []
 r, c = (0, 0)
 while True:
  if (r == num_rows-1) and (c == num_cols-1):
   break
  xy_list.append((r, c))
  wall = map_arr[r, c]
  way = []
  if wall[0] == 1:
   way.append('L')
  if wall[1] == 1:
   way.append('U')
  if wall[2] == 1:
   way.append('R')
  if wall[3] == 1:
   way.append('D')
  if len(way) == 0:
   return False
  elif len(way) == 1:	# 在坑中
   go = way[0]
   move_list.append(go)
   if go == 'L':	# 填坑
    map_arr[r, c, 0] = 0
    c = c - 1
    map_arr[r, c, 2] = 0
   elif go == 'U':
    map_arr[r, c, 1] = 0
    r = r - 1
    map_arr[r, c, 3] = 0
   elif go == 'R':
    map_arr[r, c, 2] = 0
    c = c + 1
    map_arr[r, c, 0] = 0
   elif go == 'D':
    map_arr[r, c, 3] = 0
    r = r + 1
    map_arr[r, c, 1] = 0
  else:
   if len(move_list) != 0:	# 不在坑中
    come = move_list[len(move_list)-1]
    if come == 'L':
     if 'R' in way:
      way.remove('R')
    elif come == 'U':
     if 'D' in way:
      way.remove('D')
    elif come == 'R':
     if 'L' in way:
      way.remove('L')
    elif come == 'D':
     if 'U' in way:
      way.remove('U')
   go = random.choice(way)	# 随机选一个方向走
   move_list.append(go)
   if go == 'L':
    c = c - 1
   elif go == 'U':
    r = r - 1
   elif go == 'R':
    c = c + 1
   elif go == 'D':
    r = r + 1
 r_list = xy_list.copy()
 r_list.reverse()	# 行动坐标记录的反转
 i = 0
 while i < len(xy_list)-1:	# 去掉重复的移动步骤
  j = (len(xy_list)-1) - r_list.index(xy_list[i])
  if i != j:	# 说明这两个坐标之间的行动步骤都是多余的,因为一顿移动回到了原坐标
   del xy_list[i:j]
   del move_list[i:j]
   r_list = xy_list.copy()
   r_list.reverse()
  i = i + 1
 return move_list
2.回溯法
思路:遇到岔口则将岔口坐标和所有可行方向压入栈,从栈中弹出一个坐标和方向,前进。不断重复以上步骤,最终就能抵达终点。
优缺点:计算速度快,需要空间小,但无法处理含有环路的迷宫。
代码:
def solve_backtrack(num_rows, num_cols, map_arr): # 回溯法
 move_list = ['R']
 m = 1	# 回溯点组号
 mark = []
 r, c = (0, 0)
 while True:
  if (r == num_rows-1) and (c == num_cols-1):
   break
  wall = map_arr[r, c]
  way = []
  if wall[0] == 1:
   way.append('L')
  if wall[1] == 1:
   way.append('U')
  if wall[2] == 1:
   way.append('R')
  if wall[3] == 1:
   way.append('D')
  come = move_list[len(move_list) - 1]
  if come == 'L':
   way.remove('R')
  elif come == 'U':
   way.remove('D')
  elif come == 'R':
   way.remove('L')
  elif come == 'D':
   way.remove('U')
  while way:
   mark.append((r, c, m, way.pop()))	# 记录当前坐标和可行移动方向
  if mark:
   r, c, m, go = mark.pop()
   del move_list[m:]	# 删除回溯点之后的移动
  else:
   return False
  m = m + 1
  move_list.append(go)
  if go == 'L':
   c = c - 1
  elif go == 'U':
   r = r - 1
  elif go == 'R':
   c = c + 1
  elif go == 'D':
   r = r + 1
 del move_list[0]
 return move_list
测试
rows = int(input("Rows: "))
cols = int(input("Columns: "))

Map = build_twist(rows, cols)
plt.imshow(draw(rows, cols, Map), cmap='gray')
fig = plt.gcf()
fig.set_size_inches(cols/10/3, rows/10/3)
plt.gca().xaxis.set_major_locator(plt.NullLocator())
plt.gca().yaxis.set_major_locator(plt.NullLocator())
plt.subplots_adjust(top=1, bottom=0, right=1, left=0, hspace=0, wspace=0)
plt.margins(0, 0)
fig.savefig('aaa.png', format='png', transparent=True, dpi=300, pad_inches=0)

move = solve_backtrack(rows, cols, Map)
plt.imshow(draw_path(draw(rows, cols, Map), move), cmap='hot')
fig = plt.gcf()
fig.set_size_inches(cols/10/3, rows/10/3)
plt.gca().xaxis.set_major_locator(plt.NullLocator())
plt.gca().yaxis.set_major_locator(plt.NullLocator())
plt.subplots_adjust(top=1, bottom=0, right=1, left=0, hspace=0, wspace=0)
plt.margins(0, 0)
fig.savefig('bbb.png', format='png', transparent=True, dpi=300, pad_inches=0)
以上这篇Python迷宫生成和迷宫破解算法实例就是小编分享给大家的全部内容了,希望能给大家一个参考,也希望大家多多支持【听图阁-专注于Python设计】。
