Python 实现自动获取种子磁力链接方式
因为我闲来无事,所以准备找一部电影来看看。 然后我找到了种子搜索网站,可是这类网站的弹窗广告太多,搞得我很烦。所以我就想着自己用python写一个自动获取磁力链接的脚本。
整个大概写了半个小时。
代码如下
import requests
import re
from bs4 import BeautifulSoup


url="*种子的网站*/"
header={
  "Accept":"text/html,application/xhtml+xml,application/xml;q=0.9,image/webp,*/*;q=0.8",
  "Accept-Encoding":"gzip, deflate",
  "Accept-Language":"zh-CN,zh;q=0.8",
  "Cache-Control":"max-age=0",
  "Connection":"keep-alive",
  "Content-Length":"65",
  "Content-Type":"application/x-www-form-urlencoded",
  "Host":"btkitty.bid",
  "Origin":"*种子的网站*",
  "Referer":"*种子的网站*/",
  "Upgrade-Insecure-Requests":"1",
  "User-Agent":"Mozilla/5.0 (Windows NT 10.0.14393; WOW64) AppleWebKit/537.36 (KHTML, like Gecko) Chrome/57.0.2950.5 Safari/537.36"
  }
while True:
  word=input("输入搜索关键词:")
  data={
    "keyword":word,
    "hidden":"true"
    }
  res=requests.post(url,data=data,headers=header)
  bs=BeautifulSoup(res.text,"lxml")
  itemInfo=bs.find_all("dd",class_="option")
  torrent={}
  for item in itemInfo:
    magnet=item.find_next("a",href=re.compile("magnet.*")).attrs["href"]
    name=item.find_previous("a",href=re.compile("*种子的网站*/.*\.html")).text
    size=item.find_next(text=re.compile("\u6587\u4ef6\u5927\u5c0f")).find_next("b").text
    time=item.find_next(text=re.compile("\u6536\u5f55\u65f6\u95f4")).find_next("b").text
    hot=item.find_next(text=re.compile("\u4eba\u6c14")).find_next("b").text
    torrent[name]=[name,time,size,hot,magnet]

  for item in torrent:
    print("名称:",torrent[item][0])
    print("发布时间:",torrent[item][1])
    print("大小:",torrent[item][2])
    print("热度:",torrent[item][3])
    print("磁力链接:",torrent[item][4],'\n')
运行结果如下
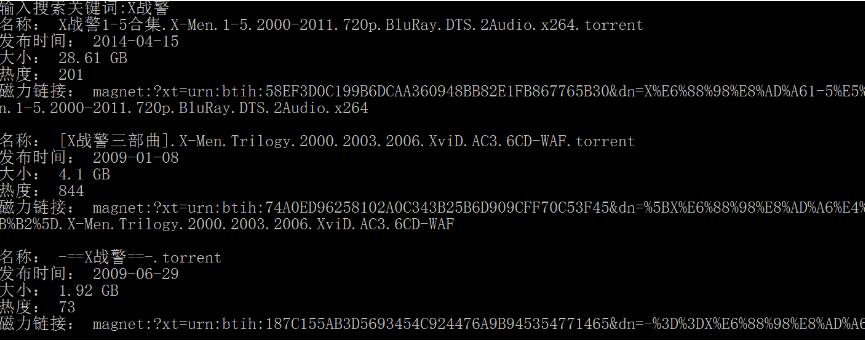
以上这篇Python 实现自动获取种子磁力链接方式就是小编分享给大家的全部内容了,希望能给大家一个参考,也希望大家多多支持【听图阁-专注于Python设计】。